Safety Precautions When Using A Battery-Powered Oscillating Tool
Have you ever wondered about the safety precautions you should take when using a battery-powered oscillating tool? Well, we’ve got you covered! In this article, we will discuss the importance of following safety guidelines while using these tools, and provide you with some essential tips to ensure your safety. So, let’s dive in and learn more about content safety precautions when using a battery-powered oscillating tool!
Using an oscillating tool can be so convenient and efficient, but it’s crucial to prioritize safety. One of the most important things to remember is to always read the manufacturer’s instructions before using the tool. This will ensure that you are familiar with the tool’s features and understand how to use it safely. Plus, it’s good practice to wear personal protective equipment such as safety goggles and gloves to protect yourself from any flying debris or sharp edges.
Another vital safety precaution is to make sure that the tool is turned off and the battery is removed or disconnected before performing any maintenance or changing accessories. This will help prevent any accidental startup or injury while working on the tool. Additionally, it’s essential to have a clear workspace and maintain a proper grip on the tool to prevent any slips or accidents.
In our upcoming article, we will delve deeper into important content safety precautions when using a battery-powered oscillating tool. We will discuss topics such as proper handling techniques, avoiding electrical hazards, and maintaining the tool for long-term safety. So, stay tuned, and we’ll provide you with all the necessary information to ensure your safety while using these versatile tools!
What is a Battery-Powered Oscillating Tool?
A battery-powered oscillating tool, also known as a multi-tool, is a versatile and portable tool that is powered by a rechargeable battery. It is designed to perform a wide range of tasks, such as cutting, sanding, scraping, grinding, and polishing.
Definition and function of a battery-powered oscillating tool
A battery-powered oscillating tool is a handheld power tool that operates by rapidly oscillating a flat or round blade, depending on the attachment being used. The oscillating motion allows the tool to make precise cuts and perform various tasks in tight spaces or hard-to-reach areas. It offers users a high level of control and versatility, making it an essential tool for professionals and DIY enthusiasts alike.
Types of tasks that can be performed with a battery-powered oscillating tool
The versatility of a battery-powered oscillating tool allows it to be used for a wide range of tasks. Some common applications include:
-
Cutting: The tool can be equipped with a cutting blade to make straight or curved cuts in various materials, such as wood, metal, plastic, and drywall. It is especially useful for plunge cuts and making precise cuts in confined spaces.
-
Sanding: With the appropriate sanding attachment, the tool can be used for sanding and refinishing surfaces, removing paint or varnish, and smoothing rough edges.
-
Scraping: The oscillating motion of the tool makes it ideal for scraping off old paint, caulk, or adhesives from surfaces.
-
Grinding and Polishing: By attaching a grinding or polishing pad, the tool can be used for tasks like grinding down rough edges, shaping metal or wood, or polishing surfaces to a smooth finish.
-
Removing Grout: With a specialized grout removal attachment, the tool can efficiently remove old grout from tile surfaces.
Importance of Safety Precautions
When using a battery-powered oscillating tool, it is crucial to prioritize safety precautions to prevent accidents or injuries. Understanding the potential risks involved and adhering to proper safety protocols is essential for a safe and successful working experience.
Understanding the potential risks involved with battery-powered oscillating tools
Although a battery-powered oscillating tool is a relatively safe tool to use, it is important to be aware of the potential risks associated with its operation. Some risks include:
-
Cuts and abrasions: The sharp blades and fast oscillating motion of the tool can cause cuts and abrasions if not used properly or if the user comes into contact with the blade.
-
Eye injuries: Dust, debris, and flying particles can pose a risk to the eyes when using the tool. Without proper eye protection, there is a chance of injury or even permanent damage.
-
Hand and finger injuries: Incorrect handling or gripping of the tool can lead to hand and finger injuries, including cuts, scrapes, and pinches.
-
Hearing damage: The high-frequency noise generated by the tool can cause hearing damage if the user does not wear proper hearing protection.
Consequences of neglecting safety precautions
Neglecting safety precautions when using a battery-powered oscillating tool can have severe consequences. Some of the consequences include:
-
Personal injuries: Neglecting safety precautions can result in injuries, such as cuts, abrasions, burns, or even amputations. These injuries can range from mild to severe and may require medical attention, leading to time off work or even permanent disability.
-
Damage to property: Using the tool without following safety protocols can lead to accidental damage to materials, surfaces, or even the tool itself. This can result in additional costs for repairs or replacements.
-
Legal and ethical responsibilities of users
As users of battery-powered oscillating tools, we have legal and ethical responsibilities to ensure our safety and the safety of those around us. It is essential to follow all safety guidelines and regulations set by the manufacturer and relevant authorities. By doing so, we can prevent accidents, protect ourselves and others from harm, and uphold our ethical obligation to prioritize safety.

Personal Protective Equipment (PPE)
Personal Protective Equipment, often abbreviated as PPE, plays a crucial role in ensuring the safety of individuals using a battery-powered oscillating tool. Understanding the essential PPE and wearing it correctly is vital for minimizing the risk of injuries.
Essential PPE required for using a battery-powered oscillating tool
When using a battery-powered oscillating tool, the following Personal Protective Equipment is essential:
-
Eye Protection: Safety goggles or glasses with impact-resistant lenses should always be worn to protect the eyes from flying debris, dust, and particles that can be generated during use.
-
Gloves: Wearing gloves can protect the hands from cuts, abrasions, and potential contact with hot surfaces or materials.
-
Hearing Protection: The high-frequency noise generated by the tool can be damaging to hearing. Wearing earmuffs or earplugs can help protect against hearing loss.
-
Respiratory Protection: Depending on the task being performed, a mask or respirator may be necessary to protect against inhalation of dust, fumes, or other harmful particles.
Choosing the right eye protection
When choosing eye protection for use with a battery-powered oscillating tool, it is important to select goggles or glasses that meet the appropriate safety standards. Look for the ANSI Z87.1 certification, which ensures that the eyewear provides the necessary impact resistance and protection against flying debris.
Importance of wearing gloves and hearing protection
Gloves are an essential part of PPE when using a battery-powered oscillating tool because they provide protection against cuts, abrasions, and potential contact with hot surfaces or materials. Additionally, wearing hearing protection, such as earmuffs or earplugs, is crucial to prevent hearing damage caused by prolonged exposure to high-frequency noise.
Safety footwear recommendations
While not directly related to the use of a battery-powered oscillating tool, wearing appropriate safety footwear is highly recommended to minimize the risk of foot injuries. Steel-toed boots or shoes with slip-resistant soles can help protect the feet from falling objects, sharp debris, or accidental contact with the tool.
Tool Inspection and Maintenance
Before using a battery-powered oscillating tool, it is essential to inspect the tool for any damage or defects. Regular tool inspection, maintenance, and proper cleaning can significantly contribute to the tool’s performance and ensure safe operation.
Checking for any damage or defects before use
Before using a battery-powered oscillating tool, inspect the tool thoroughly for any visible damage, defects, or signs of wear and tear. Check the power cord, battery, and any other components for cuts, frayed wires, or loose connections. If any damage is found, the tool should not be used and should be repaired or replaced before further use.
Cleaning and lubricating the oscillating tool regularly
Regular cleaning of the tool is important to remove any debris, dust, or particles that may accumulate during use. Use a brush or compressed air to clean the tool thoroughly, paying particular attention to the blade area and any crevices where debris may collect. Lubrication of moving parts, such as the blade attachment mechanism, should also be done regularly using the manufacturer’s recommended lubricant.
Replacing worn-out parts and batteries
Over time, the blade and other parts of the oscillating tool may become worn or damaged. It is crucial to replace these parts with genuine manufacturer replacements to ensure safe and efficient operation. Additionally, batteries should be regularly inspected for any signs of damage or decreased performance and replaced if necessary.
Safe storage and transportation practices
When not in use, the battery-powered oscillating tool should be stored in a clean, dry, and secure location away from children and pets. Ensure that the tool is properly stored to prevent accidental damage or unintentional use. When transporting the tool, ensure that it is properly secured and protected to prevent any potential damage to the tool or other objects.

Work Area Preparation
Proper work area preparation is essential for safe and efficient use of a battery-powered oscillating tool. Creating a clutter-free workspace, ensuring adequate lighting and ventilation, and securing work materials and surfaces are crucial steps to minimize the risk of accidents or injuries.
Creating a clutter-free workspace
Before using the oscillating tool, ensure that the work area is clear of clutter, debris, and any unnecessary objects. This allows for better maneuverability of the tool and reduces the risk of tripping hazards.
Ensuring adequate lighting and ventilation
Adequate lighting is essential for maintaining good visibility and preventing accidents. Ensure that the work area is well-lit, and use additional task lighting if necessary. Additionally, proper ventilation is important, especially when performing tasks that generate dust, fumes, or other airborne particles. If working in a confined space, consider using a dust collection system or wearing respiratory protection.
Securing work materials and surfaces
Before starting any task with the oscillating tool, ensure that the workpiece or material is securely stabilized. This can be achieved by clamping the material or using other appropriate securing methods. A stable workpiece reduces the risk of the tool slipping or the material moving unexpectedly during use, preventing potential injuries or damage.
Proper Tool Handling
Proper tool handling is crucial for safe and effective use of a battery-powered oscillating tool. Correct hand placement and grip techniques, avoiding accidental activation of the tool, and maintaining control and stability during operation are important aspects to consider.
Correct hand placement and grip techniques
When using a battery-powered oscillating tool, ensure that the hands are placed firmly on the tool, maintaining a secure grip. The dominant hand should grip the handle, while the other hand provides additional support and stability. Avoid placing fingers or hands near the blade or in the path of the oscillating motion to prevent injuries.
Avoiding accidental activation of the oscillating tool
Before changing attachments or performing any adjustments, always ensure that the tool is turned off and the battery is removed or disconnected. This helps to prevent accidental activation and ensures complete safety when making any changes to the tool.
Maintaining control and stability during operation
During operation, it is essential to maintain control and stability of the tool. Avoid excessive force or pushing the tool beyond its capabilities, as this may result in loss of control or the tool kicking back. Keep a firm grip on the tool, use smooth and controlled motions, and let the tool do the work without forcing it.
Safe Operating Procedures
Using a battery-powered oscillating tool safely involves following proper operating procedures as outlined by the manufacturer. Reading and understanding the manufacturer’s instructions, recognizing the limitations and capabilities of the tool, using appropriate accessories and attachments, and employing safe cutting, sanding, or scraping techniques are critical for personal safety.
Reading and following the manufacturer’s instructions
Before using a battery-powered oscillating tool, carefully read and understand the manufacturer’s instructions and safety guidelines. Familiarize yourself with the tool’s specific features, functions, and limitations. Following the manufacturer’s instructions ensures optimal performance and helps prevent accidents or damage.
Understanding the limitations and capabilities of the tool
While a battery-powered oscillating tool is versatile, it is important to understand its limitations. Different materials and tasks may require specific attachments or techniques. It is essential to use the tool within its capabilities and avoid pushing it beyond its limits. This helps maintain control and prevent accidents or tool damage.
Using the appropriate accessories and attachments
Each task requires the appropriate attachment or accessory to ensure safe and efficient operation. Always use the recommended attachment for the task at hand and securely fasten it to the tool according to the manufacturer’s instructions. Using the wrong attachments or improperly attaching them can result in poor performance, increased risk of accidents, or damage to the tool.
Safe cutting, sanding, or scraping techniques
When performing cutting, sanding, or scraping tasks, it is important to use the tool correctly to minimize the risk of injury or damage. Allow the oscillating motion of the tool to do the work, applying minimal pressure and avoiding excessive force. Maintain a stable position, use smooth and controlled motions, and avoid reaching or overextending.
Avoiding Electrical Hazards
Since battery-powered oscillating tools require electricity to charge their batteries, it is essential to be aware of and avoid electrical hazards. Using the tool in dry conditions, inspecting the power cord and charger for damages, and avoiding contact with water or other liquids are key safety precautions.
Using a battery-powered oscillating tool in dry conditions
Electricity and water do not mix, so it is crucial to ensure that the tool and work area are dry when using a battery-powered oscillating tool. Avoid using the tool in wet or damp conditions, and always keep the electrical components away from any sources of water or moisture.
Inspecting the power cord and charger for damages
Before charging or using the battery-powered oscillating tool, inspect the power cord and charger for any signs of damage or wear. Check for frayed wires, cuts, or exposed metal. If any damage is detected, the tool should not be used, and the power cord or charger should be repaired or replaced.
Avoiding contact with water or other liquids
Water is a conductor of electricity, so it is important to avoid any contact between the tool and water or other liquids. Never operate the tool with wet hands, and ensure that the tool and work area are dry before use. If necessary, use appropriate measures, such as a ground fault circuit interrupter (GFCI), to prevent electrical shock in wet or damp environments.
Emergency Preparedness
Being prepared for emergencies is a crucial aspect of using any power tool safely. Knowing the location of emergency stops and switches, having a safety plan in case of accidents or injuries, and contacting emergency services when necessary are essential steps in emergency preparedness.
Knowing the location of emergency stops and switches
Before using a battery-powered oscillating tool, familiarize yourself with the location of emergency stops and switches. In case of an emergency or an urgent need to stop the tool, knowing how to quickly and safely shut off the power can prevent further accidents or injuries.
Having a safety plan in case of accidents or injuries
Accidents or injuries can occur despite following all safety precautions. Having a safety plan in place is essential to respond effectively to emergencies. Always keep a first aid kit nearby, know how to perform basic first aid procedures, and have access to emergency contact numbers. It is also important to inform others in the vicinity about the use of the tool and any potential risks.
Contacting emergency services if necessary
In the event of a serious accident, injury, or any other emergency, do not hesitate to contact emergency services immediately. Time is critical in such situations, and prompt medical attention may be necessary. It is always better to err on the side of caution and seek professional help when needed.
Conclusion
Safety precautions when using a battery-powered oscillating tool are of utmost importance to prevent accidents, injuries, and damage to property. By understanding the potential risks involved, adhering to safety guidelines and wearing the appropriate Personal Protective Equipment, we can ensure our safety and the safety of those around us. Proper tool inspection and maintenance, preparation of the work area, correct tool handling, and following safe operating procedures are crucial for safe and efficient use of the tool. By avoiding electrical hazards, being prepared for emergencies, and contacting emergency services when necessary, we can minimize the risks associated with using a battery-powered oscillating tool. Remember, safety should always be our top priority, and by following these safety precautions, we can enjoy the benefits of using a battery-powered oscillating tool without compromising our well-being.
How To Use A Battery-Powered Reciprocating Saw Safely

Have you ever wondered how to use a battery-powered reciprocating saw safely? Well, wonder no more! We are here to guide you through the process, step by step, so that you can confidently use this powerful tool without any accidents or mishaps.
When it comes to using a battery-powered reciprocating saw, there are a few key safety measures that you need to keep in mind. Firstly, always wear the necessary protective gear such as safety glasses, gloves, and ear protection. This will help protect your eyes, hands, and ears from any potential harm.
Secondly, make sure the saw is turned off and the battery is removed before making any adjustments or changing the blade. This will prevent any accidental starts or injuries while handling the tool. Additionally, always ensure that the blade is properly installed and tightened before using the saw.
In the upcoming article, we will further delve into the various safety precautions that you need to take when using a battery-powered reciprocating saw. We will cover areas such as proper body positioning, how to handle kickback, and how to safely cut through different materials. So, stay tuned and get ready to learn all you need to know about using this handy tool safely.
Choosing the Right Battery-Powered Reciprocating Saw
When it comes to undertaking DIY projects or home renovations, having the right tools is essential. One such tool that can greatly assist in various cutting tasks is a battery-powered reciprocating saw. However, before using this powerful tool, it is important to choose the right one based on your needs and requirements.
Considering the power and speed requirements
The power and speed of a battery-powered reciprocating saw play a crucial role in determining its effectiveness and efficiency. Different models offer varying levels of power and speed, so it is important to consider the tasks you will be performing with the saw. If you anticipate working with tougher materials or larger projects, a saw with higher power and speed capabilities would be ideal.
Evaluating the battery capacity and runtime
Since the reciprocating saw operates on battery power, it is important to consider the battery capacity and runtime. A saw with a longer battery capacity and runtime will ensure that you can complete your tasks without interruptions. Additionally, it is advisable to choose a model with a battery that can be easily recharged or replaced, as this will allow for continuous use of the tool.
Checking for safety features
When it comes to using any power tool, safety should always be a top priority. Therefore, it is crucial to choose a battery-powered reciprocating saw that includes important safety features. These may include a safety lock mechanism, anti-vibration technology, and a blade guard. These safety features will help minimize the risk of accidents and injuries while using the saw.
Inspecting the Saw and Accessories
Before using a battery-powered reciprocating saw, it is important to carefully inspect both the saw and its accessories to ensure they are in proper working condition.
Examining the saw for any damage or defects
Begin by visually inspecting the saw for any signs of damage, such as cracks or missing parts. It is important to address any damage or defects before using the saw, as they can compromise both its performance and safety.
Ensuring the blade is properly installed
Check that the blade is securely and properly installed in the saw. A loose or incorrectly installed blade can lead to poor cutting performance and increase the risk of accidents. Make sure to follow the manufacturer’s instructions for installing and securing the blade.
Inspecting and testing the safety lock mechanism
Verify that the safety lock mechanism on the saw is functioning properly. This mechanism plays a crucial role in preventing accidental starts and securing the blade when not in use. Engage and disengage the safety lock mechanism to ensure it is working correctly before operating the saw.

Preparing the Work Area
Once you have inspected the saw and ensured it is in proper working condition, it is time to prepare the work area. This step is essential for creating a safe and efficient environment for using the battery-powered reciprocating saw.
Clearing the workspace of any potential hazards
Before starting any cutting task, clear the workspace of any potential hazards such as debris, tools, or cords. This will provide a clear and safe environment for operating the saw. Additionally, remove any flammable materials from the vicinity to minimize the risk of fire.
Securing the workpiece for stability
For optimal control and safety, it is important to secure the workpiece. This can be done using clamps or other appropriate methods to prevent the material from shifting during cutting. A stable workpiece will help ensure accurate and controlled cuts.
Creating a clear path for the saw’s movement
Before starting the cut, ensure there is a clear path for the saw’s movement. Avoid any obstacles or obstructions that may restrict the saw’s motion. This will allow for smooth and uninterrupted cutting, reducing the risk of accidents and injuries.
Using the Battery-Powered Reciprocating Saw
Now that the work area is prepared, it is time to use the battery-powered reciprocating saw. Following the proper techniques and guidelines will help ensure safe and accurate cuts.
Using the appropriate stance and grip
Maintaining a proper stance and grip is essential for control and stability. Stand with your feet shoulder-width apart, and hold the saw firmly with both hands. Your dominant hand should be placed on the handle, while the other hand supports the front of the saw.
Applying steady and controlled pressure
When using the saw, apply steady and controlled pressure to guide the blade through the material. Avoid using excessive force, as this can lead to loss of control and increase the risk of accidents. Let the blade do the work and allow it to cut at its own pace.
Avoiding excessive force and overexertion
It is important to avoid using excessive force or overexerting yourself while using the battery-powered reciprocating saw. Pushing too hard can cause the blade to bind or kick back, potentially leading to accidents. Work at a comfortable pace and take breaks if needed to prevent fatigue.

Understanding the Saw’s Cutting Techniques
To effectively use a battery-powered reciprocating saw, it is important to understand and practice different cutting techniques for various types of cuts.
Mastering straight-line cuts
Straight-line cuts are the most common cutting technique used with a reciprocating saw. To achieve a straight cut, align the saw’s blade perpendicular to the material and slowly guide it along the desired cutting line. Take care to maintain control and avoid deviating from the intended path.
Performing curved and angular cuts
When cutting curves or angles, it is important to allow the saw’s blade to follow the desired shape. Move the saw in a slow and controlled manner, adjusting the angle of the blade as needed. Practice on scrap material before attempting any complex curved or angular cuts to ensure accuracy.
Utilizing plunge cutting techniques
Plunge cutting involves starting a cut in the middle of a piece of material, rather than from an edge. This technique is often used for creating openings or making internal cuts. To perform a plunge cut, position the saw’s blade at the desired starting point, engage the safety lock mechanism, and slowly lower the saw into the material.
Implementing Safety Measures
To ensure the safe and proper use of a battery-powered reciprocating saw, it is important to implement certain safety measures.
Wearing appropriate safety gear
Always wear appropriate safety gear, such as safety goggles, a dust mask, and hearing protection, when operating the saw. This will help protect your eyes, ears, and respiratory system from potential hazards such as flying debris and excessive noise.
Using a blade guard and work clamp whenever necessary
When working with a battery-powered reciprocating saw, use a blade guard to protect yourself from accidental contact with the blade. Additionally, use a work clamp or vise to secure the workpiece whenever possible. This will help prevent the material from shifting during cutting, reducing the risk of accidents.
Avoiding contact with the blade or moving parts
During operation, it is crucial to avoid any contact with the blade or moving parts of the saw. Keep your hands and fingers clear of the blade’s path and away from any rotating or moving components. This will help prevent injuries and ensure a safe working environment.

Maintaining the Battery-Powered Reciprocating Saw
Proper maintenance of the battery-powered reciprocating saw is essential for its longevity and optimal performance.
Cleaning and lubricating the saw regularly
Regularly clean the saw to remove any dust, debris, or residue that may accumulate during use. Use a soft brush or cloth to clean both the exterior and interior parts of the saw. Additionally, apply lubricating oil to the necessary components as recommended by the manufacturer to ensure smooth operation.
Checking and replacing worn-out blades
Inspect the saw’s blades regularly for signs of wear or damage. Worn-out or damaged blades can reduce cutting efficiency and increase the risk of accidents. Replace any blades that are dull, chipped, or bent to ensure safe and effective cutting.
Charging and storing the battery correctly
When not in use, it is important to charge the saw’s battery according to the manufacturer’s instructions. Overcharging can shorten the battery’s lifespan, while undercharging can affect its performance. Additionally, store the saw and its battery in a cool and dry place to prevent damage and maintain their integrity.
Avoiding Common Mistakes
To ensure safe and efficient use of a battery-powered reciprocating saw, it is important to avoid common mistakes that can lead to accidents or damage.
Ignoring safety precautions
One of the most common mistakes is disregarding safety precautions. Always adhere to the safety guidelines provided by the manufacturer and use appropriate protective gear. Ignoring safety precautions can lead to serious injuries or accidents.
Using the wrong type of blade for the material
Using the wrong type of blade for the material being cut can result in poor cutting performance and potential damage to the saw or workpiece. It is important to select the appropriate blade for the specific material to be cut, whether it be wood, metal, or other materials.
Failing to secure the workpiece properly
Neglecting to secure the workpiece properly can lead to inaccurate cuts and hazardous situations. Always secure the workpiece using clamps or other appropriate methods to ensure stability and avoid the material shifting during cutting.
Troubleshooting and Problem-Solving
Even with proper use and maintenance, issues may arise while using a battery-powered reciprocating saw. It is important to be able to identify and address common problems that may be encountered.
Identifying and addressing common issues
Common issues with a battery-powered reciprocating saw may include loss of power, blade slipping, or excessive vibration. If any of these problems occur, ensure that the battery is charged, tighten the blade securely, and inspect the saw for any loose or damaged parts. If the issue persists, consult the manufacturer’s troubleshooting guide or seek professional assistance.
Resolving power or battery-related problems
If the saw’s power or battery seems to be malfunctioning, check that the battery is properly inserted and charged. If the battery connections are clean and secure, and the saw is still not functioning properly, the battery may need to be replaced. Refer to the manufacturer’s guidelines for proper battery replacement.
Seeking professional assistance, if needed
If you encounter any issues or problems with your battery-powered reciprocating saw that you are unable to resolve on your own, it is advisable to seek professional assistance. A qualified professional can provide expert guidance and ensure that your saw is in proper working condition.
Conclusion
Using a battery-powered reciprocating saw can greatly simplify and enhance your cutting tasks. However, it is essential to prioritize safety at all times. By choosing the right saw, inspecting it and its accessories, preparing the work area, using the saw correctly, implementing safety measures, maintaining the saw properly, avoiding common mistakes, and effectively troubleshooting any issues, you can ensure the safe and efficient use of a battery-powered reciprocating saw. Remember to always follow the manufacturer’s guidelines, wear appropriate safety gear, and continuously educate yourself on safe practices. By doing so, you can reap the benefits of this versatile tool while minimizing the risk of accidents and injuries.
Safety Tips For Using Battery-Powered Planers
Are you looking to use a battery-powered planer for your woodworking projects? Well, we’ve got some important safety tips that you should keep in mind! Using a battery-powered planer can be a convenient and efficient way to shape and smooth wood, but it’s crucial to prioritize safety to avoid any accidents or injuries. In this article, we’ll discuss some essential safety tips for using battery-powered planers, so you can enjoy your woodworking projects while staying safe. Let’s dive in!
First and foremost, it’s important to always wear appropriate personal protective equipment (PPE) when using a battery-powered planer. This includes safety glasses or goggles to protect your eyes from any flying debris, as well as ear protection to prevent hearing damage from the noise of the machine. Additionally, wearing a dust mask is crucial to avoid inhaling any wood dust particles that can be harmful to your respiratory system.
Another safety tip is to make sure that you have a firm and stable grip on the planer at all times. Battery-powered planers can be powerful tools, and if not properly controlled, they can easily slip or kickback. To ensure a secure grip, keep both hands on the machine, with one hand on the handle and the other on the auxiliary handle if available.
Lastly, it’s important to carefully plan your work area before using a battery-powered planer. Clear any obstacles or clutter that may cause you to trip or lose balance. Also, make sure there’s enough space for the wood you’re working on and that it’s properly secured. Taking these precautions will help minimize the risk of accidents and ensure a safer woodworking experience.
In summary, when using a battery-powered planer, always prioritize safety by wearing appropriate PPE, maintaining a firm grip on the machine, and planning your work area effectively. By following these safety tips, you can enjoy your woodworking projects while minimizing the risk of accidents or injuries. Remember, safety should always come first! Stay tuned for more detailed safety guidelines in the upcoming article.
Overview of Battery-Powered Planers
Battery-powered planers are versatile and convenient tools that allow for efficient wood planing without the need for cords or power outlets. These planers are powered by rechargeable batteries, providing users with freedom of movement and the ability to work in various locations. However, like any power tool, battery-powered planers come with their own set of risks and hazards. In this article, we will explore the advantages of battery-powered planers, understand the risks associated with their operation, and provide safety tips for using them effectively.
What is a Battery-Powered Planer?
A battery-powered planer is a handheld power tool that is used to shave and smooth the surface of wood. It consists of a motor, a rotating cutterhead with multiple blades, and a guide plate that determines the depth of the cut. These planers are commonly used in woodworking projects such as furniture making, flooring installation, and carpentry.
Advantages of Battery-Powered Planers
Battery-powered planers offer several advantages over their corded counterparts. First and foremost, their portability allows us to work in remote locations or areas without access to electrical outlets. This makes them ideal for construction sites or outdoor woodworking projects. Additionally, battery-powered planers eliminate the risk of tripping over cords or accidentally cutting them while working. They also provide freedom of movement and flexibility, allowing us to work at different angles and positions without the constraint of a cord.
Understanding the Risks
Despite the convenience and versatility of battery-powered planers, it is important to understand the risks associated with their operation. These tools have sharp rotating blades that can cause severe cuts and injuries if not used properly. Kickback, where the planer is forcefully thrown back towards the user, is a common hazard. Additionally, the high-speed rotation of the blades produces wood chips and dust, which can be harmful if inhaled or come into contact with the eyes. Lastly, improper handling or storage of the batteries can lead to fire hazards and electrical shocks.
Pre-Operation Safety Checks
Before using a battery-powered planer, it is crucial to perform a few safety checks to ensure that the tool and work area are safe.
Inspect the Battery
Check the battery for any signs of damage or corrosion. Make sure it is fully charged and secure it properly to the planer. Faulty batteries can pose a safety risk and may require replacement.
Check the Blade
Inspect the planer blade for any signs of wear or damage. Replace any dull or damaged blades immediately to ensure clean and safe cuts. Always follow the manufacturer’s instructions when changing blades.
Secure Workpiece and Workspace
Ensure that the workpiece is securely clamped or held in place to prevent it from moving during operation. Clear the workspace of any obstacles or debris that could cause accidents or interfere with the planer’s operation.

Personal Protective Equipment (PPE)
Wearing appropriate personal protective equipment (PPE) is essential when operating a battery-powered planer. The following safety gear should be worn at all times:
Safety Glasses
Protect your eyes from flying wood chips and debris by wearing impact-resistant safety glasses. They should provide full coverage and have side shields for maximum protection.
Hearing Protection
Battery-powered planers can generate loud noise levels that can damage hearing over time. Use earplugs or earmuffs to protect your ears from excessive noise exposure.
Dust Mask
To protect your respiratory system from inhaling wood dust, wear a dust mask or a respirator. Wood dust can cause respiratory problems and allergic reactions, so it is important to minimize exposure.
Gloves
Wear snug-fitting gloves that provide a good grip and dexterity. They will protect your hands from cuts and make it easier to handle the planer safely.
Safe Operating Procedures
To ensure safe operation of a battery-powered planer, follow these recommended procedures:
Read the Instruction Manual
Before using a battery-powered planer, thoroughly read and understand the instruction manual provided by the manufacturer. Familiarize yourself with the tool’s features, operation, and safety guidelines.
Positioning and Holding the Planer
Hold the planer with both hands, using a firm grip on the handles. Position yourself in a stable stance with your feet shoulder-width apart. This will provide better control and stability during operation.
Avoid Overloading the Tool
Do not exert excessive force or overload the planer. Allow the tool to cut at its own pace, applying steady and even pressure. Forcing the planer can lead to kickback or uneven cuts.
Maintaining a Stable Stance
When using a battery-powered planer, maintain a stable and balanced stance. Do not overreach or lean too far into the work area, as this may result in loss of balance and potential accidents.

Battery Safety
Proper handling, charging, and storage of batteries are crucial for safe operation of battery-powered planers.
Proper Battery Charging
Follow the manufacturer’s instructions for charging the batteries. Use only the specified chargers and do not leave the batteries unattended while charging. Overcharging or using incorrect chargers can lead to battery failures and safety hazards.
Handling and Storage of Batteries
Store batteries in a cool and dry place, away from direct sunlight or extreme temperatures. Avoid exposing batteries to water or other liquids. If a battery becomes damaged or starts leaking, handle it with care and dispose of it according to local regulations.
Common Hazards and How to Avoid Them
When using a battery-powered planer, it is important to be aware of common hazards and take necessary precautions to avoid them.
Kickback Prevention
To prevent kickback, always position the planer in such a way that the blade travels in the opposite direction of the user. Maintain a firm and secure grip on the handles and avoid applying excessive force or uneven pressure.
Avoiding Accidental Startups
Before inserting or removing the battery, ensure that the power switch is in the off position. Never leave the battery inserted when the planer is not in use, as this can lead to accidental startups and potential injuries.
Managing Dust and Debris
To minimize the accumulation of wood chips and dust, regularly clean the planer’s dust collection system. Always operate the planer in a well-ventilated area or use a dust extraction system to remove airborne particles.
Maintenance and Care
Proper maintenance and care of the battery-powered planer are essential for its longevity and safe operation.
Cleaning and Lubrication
After each use, clean the planer thoroughly and remove any residue or debris. Lubricate the moving parts as recommended by the manufacturer to ensure smooth and efficient operation.
Blade Replacement
Regularly inspect the planer blade for wear and tear. Replace the blade when necessary, following the manufacturer’s instructions. Dull or damaged blades can result in unsafe cuts and poor planing performance.
Regular Inspection
Periodically inspect the overall condition of the battery-powered planer. Check for loose screws, cracks in the housing, or any other signs of damage. Address any issues promptly to maintain the tool’s safety and functionality.
Emergency Procedures
In the event of an emergency while using a battery-powered planer, it is important to know how to react and take appropriate measures.
Emergency Shut-off
Familiarize yourself with the location and operation of the emergency shut-off switch on the planer. In case of an emergency, immediately turn off the tool to prevent further accidents or injury.
First Aid Measures
If an accident or injury occurs, provide immediate first aid as necessary. Have a well-stocked first aid kit nearby and seek professional medical attention if needed.
Additional Safety Considerations
In addition to the previously mentioned safety tips, there are a few additional considerations to keep in mind when using battery-powered planers.
Working with Batteries
Always use batteries recommended by the manufacturer and follow proper charging and storage guidelines. Do not mix different types or brands of batteries, as this can lead to compatibility issues and safety hazards.
Avoiding Fatigue
Using a battery-powered planer can be physically demanding. Take regular breaks, stretch your muscles, and stay hydrated to avoid fatigue or muscle strain.
Safe Tool Storage
When not in use, store the battery-powered planer in a safe and secure place, away from children or unauthorized users. Store the batteries separately in a designated area, ensuring they are kept in a cool and dry environment.
Conclusion
Battery-powered planers offer great convenience and versatility, but it is important to prioritize safety when using these tools. By following the safety tips outlined in this article, you can effectively mitigate risks and ensure a safe working environment. Remember to always read and understand the manufacturer’s instructions, wear appropriate personal protective equipment, and maintain your planer properly. Safe usage of battery-powered planers will not only protect you from accidents and injuries but also result in higher quality woodworking projects. Happy and safe planing!
How To Safely Operate A Battery-Powered Circular Saw
Have you ever wondered how to safely operate a battery-powered circular saw? We’ve got you covered! In this article, we’ll walk you through the steps to ensure you can use this tool with confidence. Whether you’re a DIY enthusiast or a professional, it’s important to know the proper safety precautions when using power tools. So, let’s dive in and learn more about how to safely operate a battery-powered circular saw.
First and foremost, always wear personal protective equipment (PPE) when using a circular saw. This includes safety glasses, ear protection, and gloves. Safety should be your top priority, so make sure you’re properly equipped before starting any project.
Next, familiarize yourself with the saw’s components, such as the blade guard and the depth adjustment. Knowing how to use these features correctly will help prevent accidents and ensure accurate cuts. It’s also important to ensure the battery is fully charged before operating the saw. A low battery can result in decreased power and potentially dangerous situations.
Lastly, when using a circular saw, make sure to set up a stable work area and secure your materials properly. Unstable work surfaces can lead to accidents, so it’s crucial to have a stable and well-supported workbench. Additionally, always use clamps or other securing methods to keep your materials in place. This will prevent them from shifting or slipping during the cutting process.
In conclusion, operating a battery-powered circular saw can be safe and efficient if you follow the proper guidelines. By wearing the right protective gear, understanding the saw’s components, and creating a stable work environment, you’ll be on your way to successfully using this power tool. Stay tuned for our upcoming article, where we’ll provide even more tips and tricks to make the most out of your battery-powered circular saw.

Preparation
Gathering the necessary equipment
Before using a battery-powered circular saw, it is important to gather all the necessary equipment. This includes the saw itself, a fully charged battery, a straight edge or saw guide, a protractor or angle guide (if needed), and appropriate safety gear such as safety glasses, ear protection, and gloves.
Inspecting the saw and battery
Before starting any woodworking project, it is crucial to inspect the circular saw and the battery. Check the saw for any damages or loose parts that need to be fixed before use. Inspect the battery to ensure it is fully charged and in good condition. If there are any issues, it is best to address them before using the saw.
Wearing appropriate safety gear
To ensure a safe working environment, it is essential to wear the appropriate safety gear. Safety glasses will protect your eyes from any debris generated during cutting. Ear protection should be worn to protect your hearing from the noise produced by the saw. Gloves will provide added grip and protect your hands from cuts or splinters. Always wear closed-toe shoes to protect your feet from any falling objects.
Setting Up the Work Area
Clearing the workspace
Before you begin using a battery-powered circular saw, you must clear the workspace of any clutter or obstacles. This includes removing any tools, debris, or other objects that may impede your movement or pose a safety hazard. Make sure the area is well-lit and free from tripping hazards.
Securing the workpiece
To ensure accuracy and safety while cutting, it is important to secure the workpiece properly. Use clamps or other suitable methods to secure the material being cut to a stable surface. This will prevent it from moving or sliding during the cutting process, reducing the risk of accidents.
Setting up a stable support
For longer cuts or when working with larger materials, it is advisable to set up a stable support system. This can be done using sawhorses or a workbench to provide a solid base for the workpiece. A stable support will not only make the cutting process easier but also reduce the risk of the material binding or pinching the saw blade.
Understanding the Controls
Familiarizing with the on/off switch
Before operating the battery-powered circular saw, it is important to be familiar with the location and operation of the on/off switch. This switch is used to start and stop the saw. It is usually located within easy reach of the handle for convenient operation.
Learning the different speed settings
Many battery-powered circular saws offer different speed settings to accommodate various cutting needs. Take the time to understand the different speed settings available on your saw and how they affect the cutting process. Different materials may require different speeds for optimal results.
Basic Techniques
Positioning your body and feet
To ensure stability and control while operating a battery-powered circular saw, it is important to position your body correctly. Stand with your feet shoulder-width apart and your body aligned with the cutting line. Keep your back straight and your shoulders relaxed. This will help you maintain balance and control throughout the cutting process.
Holding the saw correctly
Properly gripping the saw is crucial for both safety and accuracy. Hold the handle of the saw with one hand and place your other hand on the front of the saw, near the blade guard. This grip will provide stability and control, ensuring that the saw remains steady while cutting.
Maintaining a steady grip
While operating the saw, it is important to maintain a steady grip to prevent any sudden movements or slips. Keep your grip firm but not too tight, allowing for smooth and controlled cutting. Avoid gripping the saw too close to the blade, as this can increase the risk of accidents.
Maintaining control while cutting
To maintain control while cutting, it is essential to follow a few key techniques. Firstly, ensure that the saw blade is aligned with the cutting line. This can be done by following a mark on the workpiece or by using the saw’s guide or a straight edge as a reference. Secondly, maintain a consistent cutting speed, neither too fast nor too slow. Lastly, let the saw do the cutting by applying gentle pressure and allowing the blade to do the work.

Making Straight Cuts
Marking the cut line
Before making a straight cut, it is vital to mark the cut line on the workpiece. This can be done using a pencil or a marker, ensuring that the line is clear and visible. Take the time to double-check the accuracy of the mark before proceeding with the cut.
Using the saw’s guide or a straight edge
To ensure a straight and accurate cut, it is advisable to use the saw’s guide or a straight edge as a reference. Align the saw’s guide or the straight edge with the marked cut line, ensuring that the blade is positioned correctly. This will help guide the saw along the desired cutting path, resulting in a clean and precise cut.
Making Angled Cuts
Setting the desired angle
Battery-powered circular saws often have the ability to make angled cuts. Before making such cuts, it is important to set the desired angle. This can be done by adjusting the bevel or tilt of the saw blade. Consult the saw’s manual for specific instructions on adjusting the angle.
Using a protractor or angle guide
When making angled cuts, it is helpful to use a protractor or angle guide to ensure accuracy. These tools can be used to measure and set the desired angle before making the cut. Place the protractor or angle guide against the workpiece and adjust the saw’s bevel accordingly. This will help you achieve precise angled cuts.
Avoiding Kickback
Understanding kickback
Kickback is a dangerous situation that can occur when the workpiece binds or pinches the saw blade, causing it to violently jerk back towards the operator. To avoid kickback, it is important to understand its causes and take the necessary precautions. Kickback can be caused by factors such as incorrect cutting techniques, improper blade alignment, or working with a dull blade.
Preventing kickback by using the right techniques
To prevent kickback, it is crucial to use the right cutting techniques. Firstly, always ensure that the blade is aligned correctly with the cutting line. Secondly, avoid forcing the saw through the cut, as this can cause the blade to bind or pinch. Instead, let the saw do the work by applying gentle, even pressure. Lastly, maintain control by keeping a firm and steady grip on the saw.
Changing the Blade
Switching off and disconnecting the saw
Before changing the blade on a battery-powered circular saw, it is important to switch off the saw and disconnect it from the power source. This will prevent any accidental activation of the saw while working on the blade.
Removing the old blade
To remove the old blade, locate the blade arbor lock and engage it to lock the blade in place. Then, use a wrench to loosen and remove the arbor nut. Carefully remove the old blade, taking care not to touch the sharp edges. Place the old blade in a safe location until it can be properly disposed of.
Installing the new blade
To install a new blade, ensure that it is suitable for the material you will be cutting. Align the center hole of the new blade with the arbor, then tighten the arbor nut using a wrench. Make sure the nut is securely tightened, but avoid over-tightening as this can damage the blade or the saw.
Maintenance and Care
Cleaning the saw after use
After each use, it is important to clean the battery-powered circular saw to maintain its performance and longevity. Use a brush or compressed air to remove any sawdust or debris from the saw’s body, handle, and blade. Wipe down the saw with a clean cloth to remove any remaining dust or residue.
Keeping the battery charged
To ensure that the battery-powered circular saw is always ready for use, it is essential to keep the battery charged. Follow the manufacturer’s instructions for charging the battery and avoid overcharging or leaving it on the charger for extended periods of time. Regularly check the battery’s charge level to ensure it is ready for the next project.
Inspecting and replacing worn parts
Regularly inspect the battery-powered circular saw for any signs of wear or damage. Pay special attention to the blade, blade guard, and handle. If any parts are worn, damaged, or not functioning properly, replace them immediately. Using a saw with worn or damaged parts can compromise both the safety and performance of the tool.
Conclusion
Applying safe operating practices for battery-powered circular saws ensures a smooth and accident-free woodworking experience. By following the preparation steps, setting up the work area correctly, understanding the controls, and implementing the appropriate cutting techniques, you can confidently use a battery-powered circular saw for various projects. Remember to always wear the appropriate safety gear, secure the workpiece properly, and maintain control throughout the cutting process. By prioritizing safety and following these guidelines, you can enjoy the benefits of using a battery-powered circular saw while minimizing the risk of accidents or injuries.
How To Use A Battery-Powered Router Safely

Ever wondered how to use a battery-powered router safely? We’ve got you covered! In today’s world, staying connected is more important than ever, and having a battery-powered router can be a game-changer. But it’s essential to use it safely, considering the potential risks involved. In this article, we’ll dive into the details of how to ensure your safety while using a battery-powered router.
When it comes to using a battery-powered router safely, there are a few key things to keep in mind. Firstly, always ensure that you are using the router in a well-ventilated area. This is important because battery-powered routers can generate heat, and proper ventilation helps dissipate it. Additionally, make sure to read and follow the manufacturer’s instructions carefully to understand any specific safety precautions they recommend.
Another crucial aspect is to protect your personal information. When using a battery-powered router, it is essential to secure your network by setting up a strong password and enabling encryption. This will prevent unauthorized access and protect your sensitive data. We’ll discuss more about this in detail in the upcoming article.
Lastly, it is crucial to maintain your battery-powered router properly to ensure its longevity and safety. Regularly clean the device to prevent dust and debris accumulation, and avoid exposing it to extreme temperatures or moisture. Taking these simple precautions will go a long way in preventing accidents and ensuring the safe and optimal use of your battery-powered router.
In the upcoming article, we will delve deeper into each of these topics, providing you with step-by-step instructions and helpful tips to use a battery-powered router safely. Stay tuned and let’s explore the exciting world of wireless connectivity while keeping our safety a priority!

Understanding Battery-Powered Routers
A battery-powered router is a woodworking tool that operates on a rechargeable battery instead of being directly connected to a power outlet. This portable and convenient tool allows woodworkers to work on projects without the constraints of power cords and electrical outlets.
What is a battery-powered router?
A battery-powered router is a handheld power tool used in woodworking to hollow out or shape wood materials. It operates by spinning a cutting bit or blade at high speeds to remove material from the workpiece. Unlike traditional routers that require a direct power source, battery-powered routers are powered by lithium-ion batteries, which provide the necessary energy for operation.
How does a battery-powered router work?
A battery-powered router works by converting electrical energy from the rechargeable battery into mechanical energy. When the power switch is turned on, the energy stored in the battery is transferred to the motor of the router. The motor then spins the cutting bit or blade, allowing it to remove material from the wood. The router is controlled by the user, who guides it along the desired path to create the desired shape or cut.
Safety Precautions for Battery-Powered Routers
While battery-powered routers offer convenience and flexibility, it’s essential to prioritize safety when using these tools. Here are some safety precautions to keep in mind:
Know the limitations of the router’s battery life
Before starting any woodworking project with a battery-powered router, it’s crucial to know the limitations of the router’s battery life. Familiarize yourself with the manufacturer’s specifications regarding battery life and charging time. This will help you plan your work accordingly and prevent unexpected interruptions due to a drained battery.
Ensure proper charging of the router’s battery
To ensure the router’s battery is always ready for use, it’s important to follow proper charging procedures. Use the charger provided by the manufacturer, as using incompatible chargers or chargers not specifically designed for the router can damage the battery or pose a safety risk. Avoid overcharging the battery, as this can reduce its lifespan. Charge the battery in a well-ventilated area away from flammable materials.
Use the router in a well-ventilated area
When using a battery-powered router, it’s essential to work in a well-ventilated area to prevent the accumulation of dust and fumes. Woodworking generates fine dust particles and potentially harmful fumes from the cutting process. Good ventilation helps to minimize exposure to these particles and fumes, reducing the risk of respiratory issues.
Avoid exposure to extreme temperatures
Battery performance can be affected by extreme temperatures. Avoid exposing the router and its battery to excessively hot or cold environments, as this can cause the battery to lose capacity or even fail. Store the router and its battery in a cool and dry place when not in use, but avoid storing it in unheated or non-insulated areas during the winter months.
Keep the router away from water and moisture
Water and moisture can damage both the router and its battery. Never operate the router in wet conditions or expose it to water. If the router is accidentally exposed to moisture, immediately remove the battery and allow the tool to dry thoroughly before use. Moisture can cause corrosion and electrical damage, compromising the tool’s performance and safety.
Handle the router with care to prevent damage
Battery-powered routers are precision tools that require careful handling to ensure their longevity and performance. Avoid dropping the router or subjecting it to rough handling, as this can damage internal components and affect its functionality. Use both hands to securely grip the router during operation, and always follow proper technique and safety guidelines.
Avoid using the router near flammable materials
Woodworking often involves the use of flammable materials such as sawdust, solvents, and finishes. When using a battery-powered router, it’s crucial to maintain a safe distance from these materials to prevent accidental ignition or fires. Always keep a fire extinguisher nearby and have a clear understanding of fire safety procedures in your workspace.
Follow the manufacturer’s guidelines for safe usage
Every battery-powered router comes with a manufacturer’s instruction manual that includes guidelines for safe usage. Familiarize yourself with the manual and follow the instructions carefully. The manual will provide specific information regarding safety features, recommended operating procedures, and any potential hazards associated with the router.
Protecting Yourself while Using a Battery-Powered Router
When using a battery-powered router, it’s important to prioritize your safety. Here are some precautions to consider:
Wear appropriate protective gear
Wearing appropriate protective gear is crucial when using a battery-powered router. Always wear safety glasses to protect your eyes from flying debris. Additionally, consider wearing a face shield to protect your face from debris and a dust mask to prevent inhalation of fine dust particles. Gloves can also provide added protection and improve your grip on the router.
Maintain a safe distance from the router
When using a battery-powered router, maintain a safe distance between yourself and the tool to prevent accidental contact with the spinning bit or blade. This will help prevent injuries and accidental cuts. It’s also important to ensure that bystanders, especially children and pets, are kept at a safe distance from the work area.
Avoid touching the router while it’s in operation
Never touch the router while it’s in operation. The spinning bit or blade can cause serious injuries if in contact with your skin. It’s important to let the router come to a complete stop before making any adjustments, changing bits or blades, or moving the workpiece.
Be cautious of flying debris
The cutting process of a battery-powered router produces flying debris. These particles can pose a risk of eye injury. Always be aware of the direction in which the debris is being ejected and position yourself accordingly. It’s best to position yourself to the side of the router, using a shield to deflect debris away from your body.
Protect your eyes and face
As mentioned earlier, wearing safety glasses is essential for eye protection. The high-speed rotation of the router’s bit or blade can cause splinters and small wood pieces to project towards the operator. By wearing safety glasses and a face shield, you provide extra protection to your eyes and face.
Avoid wearing loose clothing or jewelry
When operating a battery-powered router, avoid wearing loose clothing or jewelry that could get caught in the spinning bit or blade. Loose clothing or jewelry can be pulled into the router, causing serious injuries. Wear close-fitting clothing and remove any jewelry that may pose a hazard.
Setting Up and Using a Battery-Powered Router
Now that we’ve covered the safety precautions, let’s move on to setting up and using a battery-powered router properly. Following these steps will help you achieve accurate and efficient results while minimizing the risk of accidents.
Select a suitable work area
Start by selecting a suitable work area for your woodworking project. Choose a well-lit and spacious area where you can comfortably maneuver the router. Ensure that the work surface is stable and secure to prevent any movement or vibrations while operating the tool.
Ensure the router is securely placed
Before starting the router, make sure it is securely placed on the work surface. If the router is not properly secured, it may move or tip over during operation, causing damage to the workpiece or potential injury. Use clamps or other appropriate methods to secure the router in place.
Follow the router’s instruction manual for setup
Every battery-powered router has specific setup requirements. Refer to the instruction manual provided by the manufacturer for detailed instructions on setting up the router. This may include installing or adjusting the cutting bit or blade, adjusting the depth of cut, and ensuring all components are securely attached.
Check the router’s bit and blade for proper installation
Before using the battery-powered router, double-check that the cutting bit or blade is properly installed. Ensure that it is tightly secured and aligned correctly. A loose or improperly installed bit or blade can lead to poor cutting results or even cause the bit or blade to detach during operation, posing a significant safety risk.
Securely hold the router with both hands
When using a battery-powered router, always hold it with both hands for maximum control and stability. Grip the router’s handles firmly, with one hand on the main handle and the other hand on the auxiliary handle. This grip will allow you to guide the router with precision and minimize the risk of accidents.
Start the router gradually and maintain control
When starting the router, avoid full-speed operation from the beginning. Gradually increase the speed to the desired level. This allows you to maintain control and prevents the router from jumping or jerking when it comes into contact with the workpiece. Maintain a steady and controlled motion as you guide the router along your desired path.
Use the appropriate speed and cutting technique
Different woodworking projects require different cutting speeds and techniques. Consult the router’s instruction manual for recommendations on the appropriate speed and cutting technique for your specific application. Using the wrong speed or technique can result in poor cutting quality or even damage the router and workpiece.
Avoid forcing the router into the material
Let the router’s cutting bit or blade do the work. Avoid applying excessive force or pushing the router into the material. Forcing the router can result in a poor quality cut, increased risk of kickback, and potential damage to the router and workpiece. Instead, guide the router with a steady and controlled motion, allowing the cutting bit or blade to remove the material smoothly.
Take breaks to prevent overheating
Continuous use of a battery-powered router can cause overheating. To prevent overheating, take regular breaks during your woodworking project, allowing the router to cool down. This will help maintain the router’s performance and prevent damage to internal components. Refer to the router’s instruction manual for recommended operating times and break intervals.
Clean the router and its accessories after use
After using a battery-powered router, it’s important to clean it thoroughly to remove any dust, debris, or residue that may have accumulated. Use compressed air or a small brush to clean the router’s housing, motor, and other exposed components. Ensure that the router is powered off and unplugged before cleaning. Clean the router’s accessories, such as the cutting bit or blade, following the manufacturer’s instructions.

Maintenance and Storage of Battery-Powered Routers
Proper maintenance and storage of your battery-powered router are crucial for its longevity and performance. Here are some maintenance tips to keep in mind:
Regularly inspect the router for any damage
Before and after each use, inspect the router for any signs of damage or wear. Check for cracks in the housing, loose screws, damaged cords, or any other issues that may affect the router’s functionality or safety. If any damage is found, discontinue use and seek repairs or replacement.
Clean the router and remove any debris
As mentioned earlier, regularly clean the router to remove dust, debris, and residue. This helps maintain the tool’s performance and prevents clogging or damage to internal components. Pay special attention to the router’s air vents, as they can become clogged with dust and affect cooling.
Keep the battery-powered router in a dry and secure place
When not in use, store the battery-powered router in a dry and secure place. Moisture can damage the router and its battery, so it’s important to protect it from environmental elements. Consider using a designated storage case or bag to protect the router from dust, debris, and accidental damage.
Store the router in its designated case or bag
Many battery-powered routers come with a designated storage case or bag. This case or bag is specifically designed to protect the router during storage and transportation. When not in use, always store the router in its designated case or bag for added protection.
Do not expose the router to direct sunlight
Direct sunlight can cause the router’s housing and components to warp or deteriorate over time. Avoid exposing the router and its battery to prolonged periods of direct sunlight. Ultraviolet rays from the sun can degrade the battery’s performance and shorten its lifespan.
Check and charge the battery periodically
Periodically check the battery’s charge level, even when not in use. Lithium-ion batteries have a natural discharge rate, so it’s important to ensure they are adequately charged. Follow the manufacturer’s recommendations for optimal charging intervals. Avoid discharging the battery completely, as this can also reduce its lifespan.
Replace any worn out or damaged parts
If any parts of the battery-powered router, such as the cutting bit or blade, show signs of wear or damage, replace them promptly. Using worn out or damaged parts can compromise the quality of your cuts and pose a safety risk. Always use genuine replacement parts recommended by the manufacturer.
Troubleshooting Common Issues with Battery-Powered Routers
Despite proper usage and maintenance, battery-powered routers may encounter occasional issues. Here are some common issues and possible solutions:
Router not turning on or charging
If the router fails to turn on or charge, check the battery’s charge level and connection. Ensure that the battery is securely inserted into the router and that the charger is properly connected to both the battery and a power source. If the issue persists, consult the router’s instruction manual or contact the manufacturer for further troubleshooting.
Poor performance or speed issues
If the router is experiencing poor performance or speed issues, check the battery’s charge level. A low battery charge can result in reduced power output and performance. Allow the battery to charge fully before using the router. If the issue persists, consult the router’s instruction manual or contact the manufacturer for further assistance.
Excessive noise or vibrations
Excessive noise or vibrations during router operation may indicate a problem with the cutting bit or blade. Check that the bit or blade is properly installed and securely tightened. If the issue persists, inspect the bit or blade for damage or wear. Replace the bit or blade if necessary.
Spindle lock or depth adjustment problems
If you encounter issues with the spindle lock or depth adjustment mechanism, ensure that you are following the correct procedure as outlined in the router’s instruction manual. Apply firm pressure when engaging the spindle lock to prevent slippage. If the issue persists, consult the manual or contact the manufacturer for further guidance.
Overheating or quickly draining battery
If the router becomes excessively hot or the battery drains quickly during use, allow the router to cool down and check the battery’s charge level. Overheating and quick battery drainage may indicate a strain on the router or a battery issue. If the problem persists, consult the manual or contact the manufacturer for assistance.
Inaccurate cutting or routing
If the router is producing inaccurate cuts or routes, check the stability of the router and make sure it is properly secured. Also, inspect the cutting bit or blade for damage or wear. A dull or damaged bit or blade can result in poor cutting quality. Sharpen or replace the bit or blade as necessary.

Seeking Professional Help for Battery-Powered Router Repairs
Sometimes, despite our best efforts, battery-powered routers may require professional repairs. Here are some steps to take when seeking professional help:
Identifying when professional help is needed
If you encounter persistent issues with your battery-powered router that you are unable to resolve through troubleshooting, it may be time to seek professional assistance. Look for signs such as frequent malfunctions, unusual noises, or significant decreases in performance.
Researching and contacting reputable repair services
When seeking professional help, research and identify reputable repair services that specialize in power tools and specifically battery-powered routers. Check online reviews, customer testimonials, and ratings to ensure you choose a reliable and skilled repair service.
Evaluating the cost of repair versus replacement
Before committing to repairs, evaluate the cost of repair versus the cost of a new battery-powered router. Consider factors such as the age of the router, the extent of repairs needed, and the availability of replacement parts. In some cases, it may be more cost-effective to replace the router rather than repair it.
Following any warranty or guarantee terms
If your battery-powered router is still under warranty or guarantee, review the terms and conditions. Some repairs or replacement parts may be covered by the manufacturer’s warranty, reducing the cost or providing a free repair solution. Follow the instructions provided by the manufacturer to ensure warranty coverage.
Communicating the issue clearly to the repair technician
When bringing your battery-powered router to a repair service, communicate the issue clearly to the repair technician. Provide them with as much information as possible regarding the problem, any troubleshooting steps you have already taken, and any specific concerns you may have. This will help the technician diagnose and address the issue more effectively.
Caring for the Battery and Charger of a Battery-Powered Router
Proper maintenance of the battery and charger is crucial for the performance and lifespan of your battery-powered router. Here are some tips for caring for the battery and charger:
Properly storing and charging the battery
Store the battery in a cool and dry place when not in use. Avoid exposing it to extreme temperatures, humidity, or direct sunlight. Follow the manufacturer’s instructions for proper charging procedures. Charge the battery only with the charger provided by the manufacturer and avoid overcharging or undercharging the battery to maintain its lifespan.
Checking the battery’s charge level
Periodically check the battery’s charge level, even when not in use. Lithium-ion batteries have a natural discharge rate, so it’s important to ensure they are adequately charged. Most battery-powered routers have a charge indicator or a battery level indicator that can help you track the charge level.
Using the charger provided by the manufacturer
Use the charger specifically designed for your battery-powered router. Using incompatible chargers can damage the battery or pose a safety risk. The charger provided by the manufacturer is specifically designed to deliver the correct voltage and current for optimum charging performance.
Avoiding overcharging or undercharging the battery
Overcharging or undercharging the battery can affect its performance and lifespan. Follow the manufacturer’s instructions for proper charging times. Avoid leaving the battery on the charger for extended periods of time after it has reached a full charge, as this can lead to overcharging. If you’re not planning to use the router for an extended period, partially charge the battery to about 40-50% capacity before storing it.
Replacing the battery when necessary
Batteries have a limited lifespan and will eventually need to be replaced. Signs of a deteriorating battery include decreased runtime, reduced power output, and difficulty holding a charge. When you notice these signs, it’s time to replace the battery. Refer to the router’s instruction manual or contact the manufacturer for guidance on battery replacement.
Maintaining the charger’s cleanliness and functionality
Keep the charger clean and free from dust, debris, or any other foreign substances. Regularly inspect the charger’s cords, plugs, and connectors for any signs of damage or wear. If any issues are found, discontinue use and seek repair or replacement. When storing the charger, keep it in a clean and dry place away from excess heat or moisture.
Understanding the Benefits of Battery-Powered Routers
Now that we’ve covered safety precautions, usage, maintenance, troubleshooting, and battery and charger care, let’s explore the benefits of using a battery-powered router:
Portability and freedom of movement
One of the significant advantages of battery-powered routers is their portability. They are not limited by power cords or proximity to electrical outlets, allowing woodworkers to work in various locations, including outdoor or remote areas. Battery-powered routers provide the freedom to move around without cumbersome power cords.
Versatility in various woodworking applications
Battery-powered routers offer versatility and can be used in a wide range of woodworking applications. From edge profiling and dado cutting to intricate woodworking designs, these tools can handle many tasks. Their compact size allows for maneuverability in tight spaces and the ability to work on a variety of materials.
Ease of use and convenience
Battery-powered routers are generally user-friendly and easy to operate. They eliminate the need for complex wiring or setup, making them suitable for beginners and professionals alike. Their cordless design provides convenience and allows for quick setup and immediate use.
Environmentally friendly and reduced energy consumption
Compared to traditional corded routers, battery-powered routers are more environmentally friendly. They consume less energy and produce fewer carbon emissions. By using battery power, these routers contribute to reducing overall energy consumption and dependence on fossil fuels, making them a greener option for woodworking projects.
Ideal for outdoor or remote projects
The portability and convenience of battery-powered routers make them ideal for outdoor or remote woodworking projects. Whether you’re working on a deck, a cabin, or a construction site without readily available power, battery-powered routers can provide the necessary cutting and shaping capabilities without the need for electrical outlets.
Conclusion
By following safety precautions and guidelines, you can use a battery-powered router safely and efficiently in your woodworking projects. Battery-powered routers offer numerous benefits, including portability, versatility, ease of use, and environmental friendliness. Regular maintenance and proper storage will prolong the lifespan of the router and ensure optimal performance. Understanding the benefits of battery-powered routers allows you to make an informed choice when selecting the right tool for your woodworking needs. Stay safe, enjoy your woodworking projects, and let the battery-powered router enhance your woodworking experience.
Safety Precautions When Using A Battery-Powered Impact Wrench

Have you ever wondered what safety precautions you should take when using a battery-powered impact wrench? Well, we’re here to help! In this article, we will discuss some important safety measures that you should keep in mind to ensure a safe and accident-free working environment. So whether you are a professional mechanic or a DIY enthusiast, read on to learn more about how to stay safe while using this powerful tool.
First and foremost, always remember to wear appropriate personal protective equipment (PPE) when operating a battery-powered impact wrench. This includes safety glasses or goggles to protect your eyes from flying debris and chemical splashes. Additionally, wearing sturdy work gloves can provide extra protection and prevent injuries to your hands. Remember to also wear ear protection such as earplugs or earmuffs, as impact wrenches can produce loud noises that can cause hearing damage over time.
Secondly, it is crucial to read the manufacturer’s instructions and familiarize yourself with the specific features and functions of your impact wrench. Different models may have different safety features, so understanding how to use them properly is essential. Additionally, make sure to inspect the tool before each use to ensure that it is in proper working condition. Check for any loose or damaged parts, and if any issues are detected, do not use the impact wrench until it has been repaired or replaced.
Lastly, be mindful of your workspace and surroundings. Make sure to work in a clean and well-lit area to avoid any potential hazards. Keep the area clear of any clutter or obstacles that could cause accidents or tripping. Moreover, always secure the workpiece properly and tool down any nuts or bolts before starting the impact wrench. This will prevent the workpiece from moving or flying off unexpectedly, minimizing the risk of injuries.
These are just some of the important safety precautions you should take when using a battery-powered impact wrench. By following these guidelines, you can ensure a safer and more efficient working experience. In our next article, we will dive deeper into the specific dos and don’ts of operating this powerful tool, so stay tuned for more valuable information.

Importance of Safety Precautions
At [Our Company], we understand the importance of safety when it comes to using power tools. This is especially true when using a battery-powered impact wrench, as it is a tool that can deliver a significant amount of force and has the potential to cause serious injuries if not used properly. In this article, we will discuss the importance of safety precautions when using a battery-powered impact wrench, as well as provide guidelines on choosing the right wrench, inspecting it, wearing appropriate personal protective equipment, preparing the work area, using the tool correctly, handling and charging the battery, storing the impact wrench safely, and performing regular maintenance and inspection. By following these safety guidelines, you can minimize the risk of accidents and ensure the longevity of your impact wrench.
Understanding the Risks
Before we delve into the safety precautions, it is crucial to understand the potential risks associated with using a battery-powered impact wrench. The primary risk is the potential for injuries due to the high torque and rotational force generated by the tool. This force can cause severe bodily harm if the impact wrench is not handled correctly or if safety precautions are not followed. Additionally, there is a risk of accidents occurring if the tool malfunctions or if the work area is not properly prepared. Therefore, it is essential to take the necessary precautions to minimize these risks.
Minimizing Injuries
One of the primary reasons for implementing safety precautions is to minimize injuries. When using a battery-powered impact wrench, there are several ways you can reduce the risk of injuries. Firstly, it is crucial to choose the right impact wrench for the job. Consider the power output of the wrench and ensure it is suitable for the task at hand. Using a wrench with too much power can increase the risk of accidents, while using one with insufficient power may not be effective. Secondly, evaluate the battery life of the impact wrench. A battery with a longer lifespan will ensure uninterrupted use and reduce the likelihood of accidents caused by sudden shutdowns. Lastly, check for safety features such as a trigger lock or a torque control feature that can help prevent injuries.
Preventing Accidents
Accidents can occur due to a variety of reasons when using a battery-powered impact wrench. To prevent accidents, regular inspection of the impact wrench is necessary. Check for any damages, such as cracked casings or loose parts, before each use. If you notice any damages, it is crucial to repair or replace the impacted wrench to prevent further issues. Additionally, inspect the battery connections to ensure they are secure and free from any corrosion. Faulty connections can cause the wrench to malfunction or pose a safety hazard. Finally, verify the proper functioning of the impact wrench by testing it before each use. This includes checking for any abnormal noises or vibrations, which could indicate a problem with the tool.
Choosing the Right Impact Wrench
When it comes to using a battery-powered impact wrench, choosing the right tool is of utmost importance to ensure safety and efficiency. Here are some factors to consider when selecting an impact wrench.
Consider Power Output
The power output of an impact wrench determines its ability to handle different tasks. It is crucial to choose a wrench with an appropriate power output for the tasks you will be performing. Too much power can lead to accidents or damage to the workpiece, while too little power may result in inefficient or ineffective work. By assessing your specific needs and matching them to the power output of the impact wrench, you can ensure safe and efficient operation.
Evaluate Battery Life
Battery life is another crucial factor to consider when choosing a battery-powered impact wrench. The longer the battery life, the longer you can use the tool without interruption or the need for frequent recharging. This is especially important for tasks that require extended periods of use. Additionally, longer battery life reduces the risk of sudden shutdowns, which can lead to accidents or incomplete work. Therefore, it is essential to evaluate the battery life of the impact wrench before making a purchase.
Check for Safety Features
Safety features are an integral part of any power tool, including battery-powered impact wrenches. These features are designed to ensure the safety of the user and minimize the risk of accidents. When choosing an impact wrench, it is crucial to check for safety features such as a trigger lock, which prevents accidental triggering of the tool, or a torque control feature, which allows for better control and reduces the risk of over-tightening or stripping screws and bolts. By selecting a tool with appropriate safety features, you can enhance the overall safety of your work environment.
Inspecting the Impact Wrench
Before using a battery-powered impact wrench, it is essential to inspect it thoroughly to ensure it is in proper working condition. Regular inspections can help identify any issues or damages that could pose a safety risk. Here are some inspection tasks to perform before using the impact wrench.
Checking for Damages
Inspect the impact wrench for any damages, such as cracks in the casing or any loose parts. Damages can compromise the integrity of the tool and increase the risk of accidents or malfunction. If you notice any damages, it is crucial to repair or replace the impact wrench before use. Regular inspections can help identify damages early on and prevent further issues down the line.
Inspecting Battery Connections
The battery connections of a battery-powered impact wrench play a crucial role in ensuring its proper functioning. Inspect the battery connections to ensure they are secure and free from any corrosion. Loose connections can cause the tool to malfunction or lose power unexpectedly, leading to accidents or incomplete work. If you notice any loose connections or corrosion, tighten the connections or clean the affected areas accordingly.
Verifying Proper Functioning
Before using the impact wrench, it is essential to verify its proper functioning. Start by checking for any abnormal noises or vibrations when the tool is turned on. Such signs can indicate a problem with the impact wrench and should be addressed before using the tool. Additionally, test the wrench by using it briefly on a non-essential task to ensure it operates correctly. By verifying the proper functioning of the impact wrench, you can avoid accidents and ensure optimal performance.
Wearing Appropriate Personal Protective Equipment
When using a battery-powered impact wrench, it is crucial to wear the appropriate personal protective equipment (PPE) to minimize the risk of injuries. Here are some essential PPE items to consider:
Using Safety Glasses
Safety glasses protect your eyes from any debris or particles that may be generated during the operation of the impact wrench. Flying fragments can cause severe eye injuries, and wearing safety glasses is a simple yet effective way to safeguard your vision. Choose safety glasses that are impact-resistant and provide full coverage for optimal protection.
Wearing Gloves
Gloves provide protection for your hands while using a battery-powered impact wrench. They help reduce the risk of cuts, blisters, or other injuries that may occur while handling the tool or working on the workpiece. Opt for gloves that are specifically designed for impact and vibration resistance to ensure maximum safety and comfort.
Using Ear Protection
Using ear protection, such as earplugs or earmuffs, is essential when working with a battery-powered impact wrench. The high levels of noise generated by the tool can lead to hearing damage if suitable protection is not worn. Invest in high-quality ear protection that is designed to reduce the noise level to safe levels.

Preparing the Work Area
Preparing the work area is crucial to ensure a safe and efficient working environment when using a battery-powered impact wrench. Here are some steps to follow when preparing your work area:
Clearing Debris
Before using the impact wrench, it is essential to clear the work area of any debris, such as loose screws, nails, or other objects that could pose a safety hazard. Debris on the floor can cause slips, trips, or falls and can also interfere with the operation of the impact wrench. Always ensure the work area is clear and free from any obstacles that could hinder safe operation.
Securing Workpieces
When using a battery-powered impact wrench, it is crucial to secure the workpieces properly. Unsecured workpieces can move or shift during operation, leading to accidents or incomplete work. Use appropriate clamps or vices to secure the workpieces securely in place before using the impact wrench. This will ensure stability and safety throughout the task.
Identifying Nearby Hazards
Before starting work, it is essential to identify any nearby hazards that could pose a risk to your safety or the successful completion of the task. Examples of hazards include electrical wires, sharp objects, or unstable scaffolding. By identifying and addressing these hazards, you can create a safer work environment and minimize the risk of accidents.
Using the Impact Wrench Correctly
Using the impact wrench correctly is essential to ensure both your safety and the proper functioning of the tool. When using a battery-powered impact wrench, follow these guidelines:
Maintaining a Secure Grip
When using the impact wrench, it is crucial to maintain a secure and firm grip on the tool at all times. A loose grip can result in the wrench slipping or falling out of your hand, increasing the risk of accidents or injuries. Ensure that your hands are dry and that you have a proper grip on the tool’s handle before operating it.
Positioning the Tool Correctly
Proper positioning of the impact wrench is essential for optimal performance and safety. Align the tool correctly with the fastener or workpiece and apply consistent pressure in a straight line. This will help prevent the impact wrench from slipping or deflecting, reducing the risk of accidents or damage to the workpiece.
Avoiding Overexertion
Using a battery-powered impact wrench can be physically demanding, especially when handling heavier or more substantial workpieces. It is important to avoid overexertion and take breaks as needed. Overexertion can lead to fatigue, loss of control, and increased risk of accidents. Pace yourself and ensure you have the physical stamina to complete the task safely and efficiently.
Proper Battery Handling and Charging
When using a battery-powered impact wrench, proper battery handling and charging are essential to ensure safety and prolong battery life. Follow these guidelines:
Using Recommended Batteries
Always use the recommended batteries for your specific impact wrench model. Using batteries that are not recommended can affect the performance of the tool or pose safety hazards. Follow the manufacturer’s instructions regarding battery type, voltage, and capacity to ensure optimal operation and safety.
Charging in a Well-Ventilated Area
When charging the impact wrench’s battery, it is crucial to do so in a well-ventilated area. Charging batteries generate heat, and adequate ventilation helps dissipate this heat and prolongs the battery’s lifespan. Avoid charging the batteries in closed or confined spaces to reduce the risk of overheating or other battery-related issues.
Avoiding Overcharging
Overcharging the batteries can lead to reduced performance, shortened battery life, and even safety hazards. To prevent overcharging, always follow the manufacturer’s instructions regarding charging times and procedures. Once the battery is fully charged, disconnect it from the charger promptly to avoid damage or potential accidents.
Storing the Impact Wrench Safely
Proper storage is essential to ensure the longevity of your impact wrench and prevent accidents. Here are some guidelines for storing your impact wrench safely:
Removing the Battery
Before storing the impact wrench, always remove the battery. Removing the battery prevents accidental activation of the tool and reduces the risk of damage or injuries. Store the battery separately, in a location away from extreme heat, moisture, or flammable materials, as these conditions can affect its functionality and safety.
Organizing Accessories
Keep all impact wrench accessories, such as sockets and extensions, organized and in a designated storage area. This will ensure easy access to the accessories when needed and reduce the risk of accidents caused by misplaced or scattered tools. Invest in a tool organizer or toolbox to keep everything in order.
Storing in a Dry Area
When storing the impact wrench, choose a dry and well-ventilated area. Moisture can cause corrosion and damage to the tool, affecting its performance and safety. Avoid storing the impact wrench near sources of moisture, such as water pipes or leaking roofs, and ensure the storage area is free from excessive humidity.
Regular Maintenance and Inspection
Regular maintenance and inspection of your battery-powered impact wrench are crucial for optimal performance, safety, and longevity. Here are some maintenance tasks to perform regularly:
Cleaning the Impact Wrench
Regularly clean the impact wrench to remove any debris, dust, or other contaminants that may affect its performance. Use a soft cloth or brush to clean the external surfaces of the tool, and refer to the manufacturer’s instructions for specific cleaning guidelines. Avoid using harsh chemicals or solvents that could damage the tool.
Inspecting for Wear and Tear
Inspect the impact wrench regularly for any signs of wear and tear, such as worn-out cables, cracked casings, or loose parts. These signs can indicate potential issues that may compromise the safety or performance of the tool. If you notice any wear and tear, repair or replace the impacted wrench promptly.
Replacing Faulty Parts
If any parts of the impact wrench are damaged or not functioning correctly, it is essential to replace them with genuine manufacturer-approved parts. Using faulty or incompatible parts can affect the safety and performance of the tool and increase the risk of accidents. Refer to the manufacturer’s instructions or contact their customer support for assistance in obtaining and replacing faulty parts.
Conclusion
Prioritizing safety when using a battery-powered impact wrench is crucial to minimizing the risk of accidents and ensuring the longevity of the tool. By following the guidelines outlined in this article, you can protect yourself and others, enhance the efficiency of your work, and maximize the lifespan of your impact wrench. Remember to choose the right wrench for the job, inspect it regularly, wear appropriate personal protective equipment, prepare the work area, use the tool correctly, handle and charge the battery safely, store the impact wrench correctly, and perform regular maintenance and inspection. By practicing safety precautions and following these guidelines, you can enjoy safe and efficient use of your battery-powered impact wrench. Stay safe, and happy wrenching!
How To Safely Operate A Battery-Powered Jigsaw

Have you ever wondered how to safely operate a battery-powered jigsaw? Well, you’ve come to the right place! In this article, we’re going to walk you through the important steps to ensure your safety and make the most out of your battery-powered jigsaw. So, whether you’re a beginner or an experienced user, stay tuned to learn about the dos and don’ts of using this versatile power tool.
First of all, it is crucial to familiarize yourself with the jigsaw and its components. Take a moment to read the user manual and understand how the various parts work together. This will help you handle the tool correctly and avoid any unnecessary accidents. Additionally, make sure your battery is fully charged before beginning any project, as a low battery can result in a loss of power and make the tool less effective.
Next, it’s important to wear the right protective gear when operating a battery-powered jigsaw. Safety goggles, ear protection, and gloves are essential to prevent any potential injuries. These accessories will shield your eyes from flying debris, reduce the noise levels, and protect your hands from sharp edges or vibrations.
Lastly, always keep in mind the proper cutting techniques. Start by marking the cut line on your material and securing it firmly in place. Then, ensure the jigsaw blade is appropriate for the task at hand and securely fastened. Remember to always cut with a slow and steady motion, allowing the tool to do the work. Trying to force the jigsaw can lead to accidents and damage the tool or material.
In this article, we’ll delve deeper into each of these aspects of safely operating a battery-powered jigsaw. Whether you’re a DIY enthusiast or a professional carpenter, knowing how to use this tool safely is crucial for a successful project. So, let’s get started and make sure you have all the knowledge and confidence to handle your battery-powered jigsaw with ease!
Understanding Battery-Powered Jigsaws
Battery-powered jigsaws are a versatile and convenient tool for anyone who works with wood or other materials that require precise, intricate cuts. Unlike their corded counterparts, battery-powered jigsaws offer the freedom to move around without the hassle of cords and power outlets. In this article, we will guide you on how to safely operate a battery-powered jigsaw, highlighting the benefits and key considerations when choosing the right tool. So let’s dive in!
What is a battery-powered jigsaw?
A battery-powered jigsaw, also known as a cordless jigsaw, is a handheld power tool that utilizes a reciprocating blade to make cuts in various materials, such as wood, plastic, and metal. The jigsaw’s blade moves in an up-and-down motion, allowing for precise and intricate cutting. The battery-powered design eliminates the need to be tethered to a power source, providing freedom of movement and convenience.
Benefits of using a battery-powered jigsaw
Using a battery-powered jigsaw offers numerous benefits for both professional craftsmen and hobbyists. Here are a few reasons why you should consider adding this versatile tool to your collection:
-
Portability: The cordless design allows you to work anywhere without the limitations of power cords. This makes battery-powered jigsaws perfect for outdoor projects or when working in tight spaces.
-
Convenience: With a battery-powered jigsaw, you don’t have to worry about finding an electrical outlet or untangling cords. Simply charge the battery, and you’re ready to go.
-
Versatility: Battery-powered jigsaws are suitable for a wide range of cutting tasks. Whether you need to make straight cuts, curves, or bevels, this tool can handle it all.
-
Ease of use: These jigsaws are designed to be user-friendly, making them accessible even to beginners. The lightweight and ergonomic design ensure comfortable handling for extended periods.
-
Safety: Battery-powered jigsaws eliminate the risk of accidentally cutting through a power cord, reducing the chance of electrical hazards.
Now that we understand the benefits of using a battery-powered jigsaw, let’s move on to choosing the right one.
Choosing the Right Battery-Powered Jigsaw
When selecting a battery-powered jigsaw, there are several factors to consider to ensure you get the best tool for your needs. Here are some key elements to evaluate:
Consider the power and speed options
Battery-powered jigsaws come in various power ratings, typically measured in volts. Higher voltage generally translates to more cutting power, allowing you to tackle thicker or harder materials. However, keep in mind that higher power often results in a heavier tool, which may affect maneuverability.
Additionally, consider the speed options of the jigsaw. Variable speed settings provide more control during intricate cuts and allow you to adjust the cutting speed to match the material you are working with.
Evaluate the battery life and charging time
Battery life is an essential factor, especially if you have longer or more extensive projects. Look for jigsaws with batteries that offer sufficient runtime to prevent interruption during your work. Lithium-ion batteries tend to offer longer life compared to other battery types.
Also, consider the charging time. Ideally, you want a jigsaw that charges quickly to minimize downtime. Some models come with fast-charging capabilities, allowing you to recharge the battery in a shorter amount of time.
Look for ergonomic features
Ergonomics play a vital role in ensuring comfort and reducing fatigue during prolonged use of the jigsaw. Look for features such as rubberized handles, adjustable grips, and lightweight designs. These elements contribute to better control, decreased strain on your hands, and overall improved user experience.
Prioritize trying out different models to find a jigsaw that feels comfortable and well-balanced in your hand.
Now that we’ve covered the necessary considerations when selecting a battery-powered jigsaw, let’s move on to preparing for safe operation.

Preparing for Safe Operation
Before operating a battery-powered jigsaw, it is crucial to take the necessary precautions and familiarize yourself with the tool. Here are some steps to follow for a safe and effective operation:
Read the user manual thoroughly
The user manual provides essential information about the jigsaw’s capabilities, maintenance requirements, and safety guidelines. Take the time to read and understand the manual thoroughly before using the tool. Pay particular attention to the safety instructions, as they will help you avoid potential accidents or injuries.
Inspect the jigsaw and ensure it’s in working condition
Before using the jigsaw, visually inspect the tool for any visible damage or defects. Ensure that all guards, handles, and other components are intact and functioning correctly. Check the blade for any signs of wear or damage and replace it if necessary.
Charge the battery fully before use
To ensure uninterrupted operation, it is important to charge the battery fully before using the jigsaw. Follow the manufacturer’s instructions regarding the charging procedure and recommended charging time. Avoid overcharging the battery, as this can shorten its lifespan.
By following these preparation steps, you will be ready to operate the jigsaw safely. However, personal protective equipment (PPE) is also crucial to ensure your safety during operation.
Using Personal Protective Equipment (PPE)
When using a battery-powered jigsaw, it is important to wear the appropriate personal protective equipment (PPE) to protect yourself from potential hazards. Here are some essential PPE items to consider:
Wear safety glasses
Safety glasses or goggles are crucial for protecting your eyes from flying debris. Ensure the safety glasses fit securely and provide proper coverage over your eyes.
Use hearing protection
Jigsaws can generate a significant amount of noise, which can be harmful to your hearing. Use earplugs or earmuffs to protect your hearing when operating the tool for extended periods.
Wear gloves
Gloves serve multiple purposes when using a jigsaw. They provide a better grip on the tool, reducing the risk of slippage, and also protect your hands from potential cuts or injuries.
Wearing the appropriate PPE is essential to minimize the risk of accidents or injuries. However, it is equally important to set up a safe work area to further ensure your safety.

Setting Up a Safe Work Area
Creating a safe work area is crucial in preventing accidents and ensuring a successful jigsaw operation. Here are some steps to follow when setting up your work area:
Clear the workspace of any obstacles
Remove any objects or debris from your workspace that could interfere with your movements or cause a tripping hazard. This includes cords, tools, and other materials that are not directly related to the task at hand.
Secure the workpiece properly
Ensure the workpiece is securely clamped or held in place to prevent movement during cutting. A stable workpiece reduces the risk of the jigsaw blade deviating or binding, improving accuracy and overall safety.
Ensure proper lighting and ventilation
Adequate lighting is essential for visibility, enabling you to see the cutting line and potential hazards clearly. Additionally, good ventilation helps to reduce the buildup of dust and fumes, resulting in a safer and more comfortable work environment.
By setting up a safe work area, you minimize the risk of accidents and create a conducive environment for efficient jigsaw operation. Now, let’s delve into understanding cutting techniques to ensure precise and accurate cuts.
Understanding Cutting Techniques
Mastering the different cutting techniques is essential for achieving clean and accurate cuts with a jigsaw. Here are some tips to help you become proficient in using the tool:
Choose the appropriate blade
The type of material you are cutting determines the blade you should use. Blades with a higher TPI (teeth per inch) are ideal for cutting materials like wood, while blades with a lower TPI are better suited for cutting metal. Make sure the blade is installed securely and tightened properly.
Master the cutting techniques (straight cuts, curves, bevels)
To make straight cuts, use a straight edge or guide to follow the desired cutting line. For curves, use slower cutting speeds and gradually guide the jigsaw along the curve, maintaining control at all times. Bevel cuts are achieved by tilting the baseplate of the jigsaw to the desired angle.
Practice these techniques on scrap material before tackling your actual project to gain confidence and improve your cutting skills.
Avoid binding and kickbacks
Binding occurs when the blade gets stuck in the material, causing the jigsaw to jerk or jump unexpectedly. To prevent binding, guide the jigsaw at a steady and consistent pace, applying gentle downward pressure. Kickbacks can also occur if the jigsaw blade gets pinched or caught in the material. Maintain a firm grip on the tool and be aware of potential kickback situations.
By mastering these cutting techniques and understanding the potential risks, you will be well-equipped to operate the jigsaw safely. Let’s move on to the next section, where we will explore the proper way to handle and operate the battery-powered jigsaw.

Operating the Battery-Powered Jigsaw
Operating a battery-powered jigsaw requires proper handling and technique to ensure accurate cuts and personal safety. Here are some important points to consider:
Hold the jigsaw correctly
Hold the jigsaw with both hands, placing one hand on the handle and the other on the front guide knob. This grip ensures better control and maneuverability. Maintain a comfortable and secure grip throughout the cutting process.
Start and stop the jigsaw smoothly
To start the jigsaw, apply gentle pressure to the material, allowing the blade to reach its maximum speed before fully engaging. When stopping, release the pressure gradually, allowing the blade to come to a complete stop. Abruptly stopping or releasing pressure can cause the blade to kick back unexpectedly.
Maintain a steady cutting pace
Maintain a steady and consistent cutting speed, allowing the blade to do the work without forcing or pushing too hard. Applying excessive pressure can result in less accurate cuts and increase the risk of binding or kickback.
By following these operating guidelines, you will ensure smooth and precise cutting with your battery-powered jigsaw. However, it is important to be aware of potential hazards and know how to deal with them.
Dealing with Potential Hazards
While operating a battery-powered jigsaw, it is crucial to be aware of potential hazards and take appropriate precautions. Here are some key points to keep in mind:
Avoid contact with the blade
Never place your fingers or any body part in close proximity to the blade while the jigsaw is running. Even when the jigsaw is switched off, exercise caution when handling the blade, as it can still be sharp.
Handle the battery safely
When removing or installing the battery, ensure the jigsaw is switched off to prevent accidental activation. Follow the manufacturer’s instructions for proper battery handling, including storing and charging.
Be cautious of electrical hazards
Although battery-powered jigsaws eliminate the cord-related electrical hazards, it is still essential to be cautious of other potential electrical risks. Avoid using the jigsaw in wet or damp environments and ensure all electrical connections are secure and properly insulated.
By being vigilant and taking precautionary measures, you can minimize the risk of accidents and safely operate your battery-powered jigsaw.

Performing Maintenance and Storage
Proper maintenance and storage of your battery-powered jigsaw are essential to extend its lifespan and ensure consistent performance. Here are some maintenance tips to follow:
Clean the jigsaw after use
After each use, remove any dust, debris, or residue from the jigsaw. Use a soft brush or cloth to clean the tool, paying special attention to the blade and moving parts. Regular cleaning helps to maintain the jigsaw’s performance and prevents the buildup of material that can affect its operation.
Inspect and replace worn-out parts
Regularly inspect the jigsaw for signs of wear or damage. Check the blade, baseplate, handles, and other components for any visible defects or wear. Replace any worn-out or damaged parts to ensure safe and effective operation.
Store the jigsaw and battery properly
When not in use, store the jigsaw and battery in a clean, dry, and secure location. Keep the battery away from extreme temperatures and moisture, as these can adversely affect its performance. Additionally, store the jigsaw in a dedicated case or toolbox to prevent damage and ensure it remains in good working condition.
By following these maintenance and storage practices, you can prolong the lifespan of your battery-powered jigsaw and maintain its optimal performance.
Conclusion
In conclusion, operating a battery-powered jigsaw can be both enjoyable and efficient if done correctly. By understanding the benefits of using this versatile tool, choosing the right jigsaw, and taking the necessary safety precautions, you can confidently and safely complete your woodworking projects.
Remember to always prioritize your safety by wearing the appropriate personal protective equipment (PPE), setting up a safe work area, and following proper cutting techniques. Regular maintenance and storage will ensure the longevity of your battery-powered jigsaw, allowing you to reap its benefits for years to come.
So, whether you’re a professional craftsman or a DIY enthusiast, the battery-powered jigsaw is a valuable addition to your toolkit. Happy cutting and stay safe!

How To Use A Battery-Powered Grinder Safely
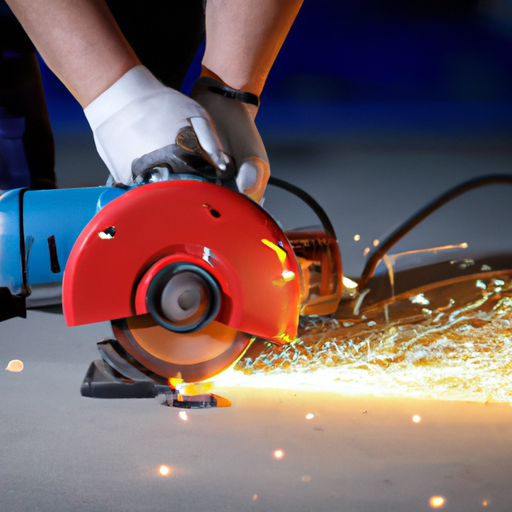
Have you ever wondered how to use a battery-powered grinder safely? Well, you’re in luck because we’ve got all the information you need right here! Whether you’re a seasoned DIYer or just getting started, using a grinder can be a useful skill to have. In this article, we’ll walk you through the steps to ensure you can use a battery-powered grinder safely and effectively. So, let’s dive in and learn more about this handy tool!
First things first, before using a battery-powered grinder, it’s important to familiarize yourself with the tool. Take some time to read the manual and understand its features and functions. Make sure you know how to properly install and secure the grinding disc or attachments. This will not only ensure your safety but also help you achieve the desired results.
Now that you’re familiar with the grinder, let’s talk about safety precautions. Always wear suitable protective gear, such as safety goggles, gloves, and a dust mask, to protect yourself from any potential hazards. It’s also crucial to work in a well-ventilated area to minimize the risk of inhaling dust or fumes. And always remember to keep your fingers and hands away from the moving parts of the grinder to avoid any accidents.
Once you’ve taken all the necessary precautions, it’s time to use the grinder. Start by choosing the right disc or attachment for your task, whether it’s cutting, grinding, or polishing. Hold the grinder with a firm grip and maintain a steady hand and posture while working. If possible, secure your workpiece firmly to prevent any movement while you’re operating the grinder. And remember to take breaks when needed, as using a grinder can be physically demanding.
In conclusion, using a battery-powered grinder can be a safe and rewarding experience when done correctly. By familiarizing yourself with the tool, taking safety precautions, and using proper technique, you’ll be able to achieve the desired results while keeping yourself protected. We hope this article has provided you with valuable insights on how to use a battery-powered grinder safely. So go ahead and give it a try on your next project!

Choosing the Right Grinder
Battery-powered grinders are a versatile tool that can be handy for many different applications. Whether you are a DIY enthusiast or a professional, it’s important to choose the right grinder for the job at hand. In this section, we will discuss the factors you need to consider when choosing a battery-powered grinder.
Considering the Purpose
Before purchasing a battery-powered grinder, it’s essential to identify the intended use. Some grinders are designed for specific tasks, such as cutting, grinding, or polishing. Knowing the purpose for which you will primarily use the grinder will help you determine which features and specifications are necessary.
For example, if you plan to use the grinder for cutting metal, you would need a grinder with a high RPM (Revolutions Per Minute) and a cutting wheel attachment. On the other hand, if you intend to use it for grinding or polishing, you might prioritize a grinder with variable speed settings and different types of grinding wheels.
Evaluating Power and Speed
The power and speed of a battery-powered grinder play a crucial role in its performance. These two factors are typically measured in volts and RPM, respectively.
Grinders with higher voltages generally offer more power, which can be beneficial for heavy-duty tasks. However, keep in mind that higher voltage grinders may also be heavier and bulkier, which can affect maneuverability. For lighter tasks, a lower voltage grinder might be sufficient.
The RPM of a grinder determines how fast the wheel spins. For cutting and grinding, higher RPMs are generally preferred as they provide more efficient and precise results. However, it’s important to note that higher RPMs also increase the risk of accidents and require more careful handling.
Examining Safety Features
Safety features are an essential aspect to consider when choosing a battery-powered grinder. These features ensure your protection and minimize the risk of accidents while using the tool.
Look for grinders with features like trigger locks, which prevent unintentional activation, and anti-vibration handles, which reduce hand fatigue and enhance control. Additionally, grinders with adjustable safety guards allow you to position the guard in a way that provides maximum protection while working.
It’s also crucial to ensure that the grinder you choose has a reliable braking system. This feature helps stop the grinding wheel quickly after you release the trigger, minimizing the risk of injuries.
Understanding the Components
Once you have chosen the right battery-powered grinder, it’s essential to familiarize yourself with its various components. Understanding the parts of the grinder will help you use it safely and effectively.
Identifying the Grinder Parts
A typical battery-powered grinder consists of several key parts:
-
Handle: The handle allows you to grip and control the grinder while in use. Look for grinders with ergonomic handle designs for improved comfort and stability.
-
Power switch: The power switch, usually located near the handle, allows you to turn the grinder on and off.
-
Battery compartment: This is where you insert and secure the battery. Make sure the battery compartment is clean and free of any debris or damage.
-
Grinder head: The grinder head houses the grinding wheel and other attachments. It’s important to ensure that the grinding wheel is properly secured before operating the grinder.
Exploring the Battery
The battery is a critical component of a battery-powered grinder. Before using the grinder, it’s important to inspect the battery and ensure it is in good condition. Follow these steps to handle the battery safely:
-
Check the battery for any signs of damage, such as cracks or leaks. If you notice any damage, do not use the battery and replace it immediately.
-
Make sure the battery is fully charged before using the grinder. A fully charged battery will provide optimal performance.
-
Follow the manufacturer’s instructions for charging and maintaining the battery. Overcharging or improperly handling the battery can lead to malfunctions and accidents.
Analyzing the Grinding Wheel
The grinding wheel is the key tool used in a battery-powered grinder. It’s essential to select the right grinding wheel for your specific task. Follow these guidelines when analyzing the grinding wheel:
-
Check the compatibility of the grinding wheel with your grinder. Different grinders require specific types and sizes of grinding wheels.
-
Inspect the grinding wheel for any cracks, chips, or other signs of damage. Using a damaged grinding wheel can lead to accidents and injuries.
-
Ensure that the grinding wheel is properly installed and tightened before use. A loose or improperly fitted grinding wheel can cause unstable operation and pose a safety hazard.
Preparation and Safety Measures
Before operating a battery-powered grinder, proper preparation and safety measures are crucial to ensure a safe working environment. This section will guide you through the necessary steps for preparation and safety.
Inspecting the Grinder
Before you start using the grinder, take a few moments to inspect it thoroughly. Look for any loose or damaged parts, such as the grinding wheel, handle, or safety guard. Ensure that all components are securely fastened and in good working condition.
If you notice any issues, do not use the grinder until the problem is addressed. Operating a faulty grinder can result in accidents and injuries.
Ensuring Proper Personal Protective Equipment
Wearing the appropriate personal protective equipment (PPE) is essential when using a battery-powered grinder. PPE helps protect you from potential hazards, such as flying debris, sparks, and noise.
At a minimum, always wear safety glasses or a face shield to protect your eyes from debris. Additionally, sturdy work gloves can help protect your hands from cuts and burns. Depending on the task, you may also need to wear ear protection, a dust mask, and long sleeves to protect your skin.
Clearing the Workspace
Before using the grinder, make sure your workspace is clean and free of any potential hazards. Remove clutter, loose objects, and any flammable materials from the area. This will help prevent accidents and minimize the risk of fire hazards.
Ensure that the workspace is well-lit, allowing you to see clearly while operating the grinder. Adequate lighting can help you identify potential dangers and work more safely and efficiently.
Battery Handling
Proper handling of the battery is essential for the safe and effective use of a battery-powered grinder. This section will cover the necessary steps for charging, maintaining, and storing the battery.
Charging and Maintaining the Battery
To ensure optimal performance and prolong the lifespan of your battery, follow these guidelines for charging and maintenance:
-
Use the charger provided by the manufacturer. Using an incompatible charger can damage the battery and pose safety risks.
-
Read and follow the manufacturer’s instructions for charging times and procedures. Overcharging the battery can reduce its lifespan and increase the risk of malfunctions.
-
Store the battery at room temperature in a dry and well-ventilated area. Extreme temperatures and humidity can negatively affect the battery’s performance.
Handling Battery Storage
When not in use, it’s essential to store the battery properly to prevent damage and maximize its lifespan. Follow these tips for safe battery storage:
-
Remove the battery from the grinder when not in use. This prevents accidental activation and prolongs the battery’s charge.
-
Store the battery in a cool, dry place away from direct sunlight and moisture. Avoid exposing the battery to extreme temperatures as it can affect its performance.
-
Keep the battery away from flammable materials and other objects that can damage or puncture it.
Battery Safety Precautions
While handling the battery, be aware of the following safety precautions:
-
Never attempt to disassemble or modify the battery. Doing so can result in electric shock, fires, or other hazardous situations.
-
If the battery becomes damaged, such as if it is punctured or overheated, do not continue using it. Dispose of the damaged battery according to local regulations.
-
Do not expose the battery to water or other liquids. Water damage can cause malfunctions and pose safety risks.

Operating the Battery-Powered Grinder
After ensuring that your grinder and battery are in proper working condition, it’s time to start using the battery-powered grinder. This section will guide you through the steps to operate the grinder safely and efficiently.
Positioning and Stability
Before starting the grinder, position yourself in a stable and comfortable stance. Keep your feet shoulder-width apart and firmly planted on the ground. This will provide stability and allow better control while using the grinder.
Hold the grinder with both hands, ensuring a secure grip on the handle. Avoid overreaching or leaning while operating the grinder, as this can compromise your balance and control.
Activating the Grinder
To activate the grinder, locate the power switch and firmly press it with your thumb or finger. Ensure that the power switch is easily accessible and can be quickly turned off in case of an emergency.
After activating the grinder, wait for the grinding wheel to reach its maximum speed before applying it to the workpiece. Premature contact can result in a loss of control and damage to the material being worked on.
Controlling Speed and Pressure
Controlling the speed and pressure during operation is crucial for achieving accurate and safe results. Follow these guidelines:
-
Maintain a consistent speed throughout the grinding process. Rapidly changing the speed can lead to uneven grinding or damage the material.
-
Avoid excessive pressure on the grinder. Applying too much force can cause the grinding wheel to bind or kick back, posing a significant risk of injury.
-
Let the grinder do the work. Do not force the grinding wheel onto the material. Instead, allow the rotation of the wheel and the weight of the grinder to apply the necessary pressure.
Safe Grinding Techniques
Using the correct grinding wheel and employing safe grinding techniques are essential for a successful grinding operation. This section will provide guidance on selecting the right grinding wheel and maintaining proper grip.
Choosing the Correct Grinding Wheel
Different tasks require different types of grinding wheels. Consider the material you are working on and select a grinding wheel designed for that specific material. Consult the grinder’s manual or a professional for guidance if you are unsure.
Inspect the grinding wheel for any damage before each use. A damaged grinding wheel should be replaced immediately to prevent accidents.
Maintaining Proper Grip
Maintaining a proper grip on the grinder is essential for safety and control. Keep the following tips in mind:
-
Use both hands to firmly grip the grinder handle. This will enhance stability and control during operation.
-
Keep your fingers away from the grinding wheel and other moving parts. Accidentally touching the wheel can result in severe injuries.
-
Avoid wearing loose clothing or jewelry that could get caught in the grinder. Loose items pose a significant safety risk and can be easily entangled in the moving parts.
Avoiding Inappropriate Grinding
Never use a battery-powered grinder for tasks it is not designed for. Grinding wheels are designed for specific materials and applications. Using the grinder for unintended purposes can lead to accidents, damage to the grinder, or poor results.
Always read the manufacturer’s instructions and recommendations for safe and appropriate use. If you are unsure whether a specific task is suitable for your grinder, consult a professional.
Dealing with Sparks and Dust
Using a battery-powered grinder generates sparks and creates dust, both of which can pose safety hazards. This section will cover measures to mitigate fire hazards, protect against eye injuries, and minimize respiratory risks.
Mitigating Fire Hazards
When working with a battery-powered grinder, take precautions to prevent fires:
-
Ensure that there are no flammable materials in the vicinity of your workspace. Sparks generated during grinding can ignite flammable substances.
-
Keep a fire extinguisher or a bucket of sand nearby for quick access in case of an emergency.
Protecting Against Eye Injuries
Grinding creates debris and sparks that can cause eye injuries. Protecting your eyes is of utmost importance. Wear safety glasses or a face shield that provides appropriate coverage and meets safety standards.
Regularly inspect your eye protection gear for cracks or scratches. Damaged eye protection should be replaced immediately.
Minimizing Respiratory Risks
Grinding operations often generate dust or fumes that can be harmful if inhaled. Minimize respiratory risks by following these tips:
-
Wear a dust mask or a respirator that is suitable for the materials being worked on. Ensure that the mask fits properly and provides adequate protection.
-
Work in a well-ventilated area or use local exhaust ventilation to remove dust and fumes from the workspace.
-
After the grinding operation, clean up any accumulated dust or debris using appropriate cleaning methods, such as wet sweeping or vacuuming.
Routine Maintenance and Cleaning
Regular maintenance and cleaning of your battery-powered grinder will ensure its longevity and optimal performance. This section will provide guidance on inspecting and cleaning the grinder, replacing grinding wheels, and lubricating moving parts.
Inspecting and Cleaning the Grinder
Regularly inspect the grinder for any signs of wear, damage, or loose parts. Tighten any loose screws or bolts and replace any damaged components. Inspecting the grinder before each use will help identify potential issues and prevent accidents.
Cleaning the grinder after each use is also essential. Remove any debris, dust, or other materials from the tool, especially around the grinding wheel. Use a soft brush or a compressed air canister to clean hard-to-reach areas.
Replacing the Grinding Wheel
Over time, the grinding wheel will wear down and lose its effectiveness. Replace the grinding wheel when it becomes noticeably worn or damaged. Consult the grinder’s manual or a professional if you are unsure how to replace the grinding wheel properly.
When replacing the grinding wheel, make sure to select the correct size and type and follow the manufacturer’s instructions.
Lubricating Moving Parts
Lubricating moving parts, such as the handle pivot or the battery compartment, can help maintain smooth operation and prolong the life of your grinder. Refer to the grinder’s manual for specific lubrication instructions and use the recommended lubricant.
Apply lubricant sparingly, as excessive lubrication can attract dust and debris, leading to malfunctions.
Troubleshooting Common Issues
Even with proper care and maintenance, grinders can experience malfunctions or issues. This section will address common grinder problems and provide guidance on how to resolve them.
Identifying Grinder Malfunctions
If you notice any unusual sounds, vibrations, or overheating while operating the grinder, stop using it immediately and inspect for potential issues. Common signs of malfunctions include:
-
Grinding wheel wobbling or vibrating excessively.
-
Lack of power or reduced performance.
-
Difficulty turning the grinder on or off.
Resolving Power or Battery Problems
If you experience power or battery-related issues with your grinder, follow these troubleshooting steps:
-
Check the battery for proper insertion and connection. Ensure that it is securely in place and making a proper connection.
-
If the battery is fully charged, but the grinder lacks power, try using a different battery to determine if the problem lies with the battery or the grinder.
-
If the battery does not hold a charge or drains quickly, it may need to be replaced. Consult the manufacturer or a professional for assistance.
Fixing Grinding Wheel Issues
If you encounter any issues with the grinding wheel, such as wobbling or poor performance, follow these steps:
-
Ensure that the grinding wheel is properly installed and tightened. A loose wheel can cause instability and compromise safety.
-
Check the condition of the grinding wheel. Replace it if it is worn, damaged, or incompatible with the task at hand.
-
Inspect the grinder’s housing and attachments for any signs of misalignment or damage. Misalignment can affect the performance of the grinding wheel.
Conclusion
Using a battery-powered grinder can significantly simplify your cutting, grinding, and polishing tasks. However, it’s crucial always to prioritize safety during operation. By selecting the right grinder, understanding its components, following safety measures, and employing safe grinding techniques, you can use a battery-powered grinder safely and effectively.
Remember to consider the purpose of your grinder, evaluate its power and speed, and examine safety features when choosing the right model. Understand the different grinder parts, explore the battery, and analyze the grinding wheel to ensure proper functioning. Prepare your workspace, inspect the grinder, and equip yourself with the necessary personal protective equipment.
Handle the battery with care, following proper charging, maintenance, and storage procedures. Operate the grinder with stability, control, and adherence to speed and pressure guidelines. Choose the correct grinding wheel, maintain a proper grip, and avoid inappropriate grinding techniques. Mitigate fire hazards, protect against eye injuries, and minimize respiratory risks associated with sparks and dust.
Routine maintenance and cleaning are essential to keep your grinder in optimal condition. Inspect and clean the grinder regularly, replace the grinding wheel as needed, and lubricate moving parts according to the manufacturer’s recommendations. Troubleshoot common issues, including grinder malfunctions, power or battery problems, and grinding wheel issues.
Always emphasize the importance of safety when using a battery-powered grinder. Follow the manufacturer’s instructions and recommendations, seek professional guidance when necessary, and continuously educate yourself on proper usage techniques. By prioritizing safety, you can confidently utilize a battery-powered grinder, completing your tasks efficiently and without compromising your well-being.
Safety Tips For Using Battery-Powered Nail Guns

Have you ever wondered how to safely use a battery-powered nail gun? Well, you’ve come to the right place! In this article, we’re going to share some important safety tips that will help you stay safe and get the job done. So, whether you’re a professional contractor or a DIY enthusiast, keep reading to learn more about using battery-powered nail guns safely.
First and foremost, it’s crucial to always follow the manufacturer’s instructions. These instructions are designed to keep you safe and ensure that the tool functions properly. Make sure you read the instruction manual carefully and understand how to operate the nail gun before using it. If you have any doubts or questions, don’t hesitate to reach out to the manufacturer or consult with a professional.
Another important safety tip is to wear the appropriate personal protective equipment (PPE). This includes safety goggles, a hard hat, ear protection, and gloves. Nail guns can produce loud noises and flying debris, so protecting your vision, hearing, and hands is essential. Additionally, it’s a good idea to wear long sleeves and pants to protect your skin from potential injuries.
Lastly, practice good housekeeping. Keep your work area clean and tidy to avoid trip hazards and accidental discharge of the nail gun. Make sure you have a stable and secure work surface to operate the tool on. Also, keep bystanders and pets at a safe distance. It’s important to maintain a clear and safe workspace to prevent accidents and ensure your safety.
Now that you have a good overview of some important safety tips for using battery-powered nail guns, we encourage you to continue reading our article for more in-depth information and advice. Ensuring your safety and the safety of those around you is crucial, so take the time to learn all about it. Happy nailing!

Understanding Battery-Powered Nail Guns
Battery-powered nail guns are versatile and convenient tools commonly used in construction, woodworking, and home improvement projects. They offer the benefit of portability without the need for a cumbersome air compressor or electrical cord. However, using these tools safely is of utmost importance to prevent accidents and injuries. In this article, we will explore the components of a battery-powered nail gun, the advantages of using them, and provide important safety tips for their operation.
Components of a Battery-Powered Nail Gun
A battery-powered nail gun consists of several key components that work together to drive nails into the desired material. These include the battery pack, the nail magazine, the motor, and the trigger mechanism. The battery pack provides the power needed to operate the nail gun, while the nail magazine holds the nails securely in place. The motor powers the movement of the nail, and the trigger mechanism controls when the nail is fired. Understanding how these components work in unison is essential for safe and effective operation.
Advantages of Using Battery-Powered Nail Guns
One of the main advantages of battery-powered nail guns is their portability. Unlike pneumatic nail guns, which require an air compressor and long air hoses, battery-powered models can be used anywhere without the need for a power source or cords. This makes them ideal for working in tight spaces or areas without access to electricity. Additionally, battery-powered nail guns are often lighter and more maneuverable, reducing user fatigue and allowing for more precise nail placement.
Preparing for Safe Operation
Before using a battery-powered nail gun, it is crucial to take certain precautions to ensure safe operation. This includes inspecting the battery and gun for any damage, checking the power level and battery charge, and wearing appropriate personal protective equipment (PPE).
Inspecting the Battery and Gun for Any Damage
Before using a battery-powered nail gun, carefully inspect the battery and gun for any signs of damage or wear. Check for cracks, loose connections, or any other issues that may affect the tool’s performance or safety. If any damage is detected, the nail gun should not be used until it has been repaired or replaced.
Checking the Nail Gun’s Power Level and Battery Charge
To avoid unexpected power loss during use, always check the power level and battery charge before starting a project. Ensure that the battery is fully charged, and if necessary, have a spare battery on hand for extended use. It is also helpful to monitor the power level periodically during use to prevent sudden power loss.
Wearing Appropriate Personal Protective Equipment
When operating a battery-powered nail gun, it is crucial to wear appropriate personal protective equipment to protect against potential hazards. This includes safety goggles to shield the eyes from flying debris, ear protection to reduce the noise level, and gloves to protect the hands from potential injuries. Additionally, wearing long sleeves and sturdy footwear can provide extra protection.
Using the Battery-Powered Nail Gun Safely
Proper technique and safe operation are essential when using a battery-powered nail gun to minimize the risk of accidents or injuries. The following tips will help ensure safe use.
Maintaining a Secure Grip on the Nail Gun
Always maintain a secure grip on the nail gun with both hands. This provides better control and stability, reducing the chance of the tool slipping or accidentally firing a nail. Keep fingers away from the trigger until ready to fire.
Positioning the Nail Gun Correctly
Position the nail gun properly before firing. Hold the tool perpendicular to the surface at a slight distance, ensuring that the nose of the gun is pressed firmly against the material. This helps prevent the nail from ricocheting or getting stuck halfway, reducing the risk of injuries.
Avoiding Contact with the Trigger until Ready to Fire
Do not touch the trigger of the nail gun unless ready to fire. Accidental contact with the trigger can result in unintended firing of nails, potentially causing injuries to yourself or others nearby.
Never Pointing the Nail Gun at Anyone
It is crucial to never point the nail gun at anyone, even if it is not loaded or the safety is engaged. Treat the nail gun as if it were always loaded and ready to fire, keeping it pointed away from yourself and others at all times.
Tips for Nail Placement and Operation
Proper nail placement and operation are crucial for effective and safe use of a battery-powered nail gun. The following tips will help ensure accurate nail placement and minimize the risk of accidents.
Choosing the Correct Nail Size for the Task
Selecting the correct nail size for the task is essential for proper nail placement and a secure hold. Using nails that are too short or too long can result in nails not being driven deep enough or penetrating through the material. Refer to the manufacturer’s guidelines or seek professional advice to determine the appropriate nail size for your specific project.
Pressing the Nail Gun Firmly against the Surface
Before firing the nail gun, ensure that the nose of the gun is pressed firmly against the surface. This helps prevent the nail from deflecting or causing damage to the material. Apply steady pressure while firing to ensure proper nail penetration.
Keeping Fingers Clear of the Nail Gun’s Path
Always keep your fingers clear of the path of the nail gun. Avoid placing your fingers in front or near the nail exit point to prevent accidental contact with the nail or the firing mechanism. Using caution and maintaining a safe distance will greatly reduce the risk of injuries.

Preventing Potential Hazards
To further enhance safety while using a battery-powered nail gun, it is essential to create a safe working environment. This includes working in a well-lit and ventilated area, keeping the workspace clear of debris and obstacles, and using extension cords properly.
Working in a Well-Lit and Ventilated Area
Working in a well-lit area is crucial for visibility and accuracy. Good lighting helps ensure that nails are placed correctly and reduces the risk of accidental firing. Additionally, working in a well-ventilated area is important to prevent the buildup of fumes or airborne particles that might be present during certain projects.
Keeping the Work Area Clear of Debris and Obstacles
Maintaining a clean and organized work area is essential to prevent accidents. Remove any debris, such as sawdust or loose nails, that may interfere with the safe operation of the nail gun. Additionally, ensure there are no obstacles or clutter that may hinder movement or cause tripping hazards.
Using Extension Cords Properly
If an extension cord is needed for the nail gun, it is important to use it properly. Ensure that the extension cord is in good condition, free of any damage or fraying. Use a cord of adequate length and gauge to prevent power loss or overheating. Avoid running cords across walkways or areas where they may become a tripping hazard.
Maintaining Battery-Powered Nail Guns
Regular maintenance and proper storage of battery-powered nail guns are essential for their longevity and safe operation. The following tips will help ensure the continued performance of the tool.
Regularly Cleaning the Nail Gun
After each use, it is important to clean the nail gun thoroughly. Remove any dirt, debris, or exposed nails that may have accumulated in or around the nail magazine or other parts of the gun. Cleaning the tool regularly will prevent clogs and ensure smooth operation.
Inspecting and Replacing Worn Parts
Regularly inspect the nail gun for any worn or damaged parts. Pay attention to the condition of the battery pack, the trigger mechanism, and the nail magazine. If any components show signs of wear or malfunction, they should be replaced immediately to prevent accidents or further damage to the nail gun.
Storing the Nail Gun and Battery Safely
When not in use, store the nail gun and battery in a safe and dry location. Protect them from extreme temperatures and moisture, as these can damage the battery and affect the performance of the tool. Additionally, properly secure the nail gun to prevent unauthorized access and potential misuse.
Understanding Nail Gun Malfunctions
Even with proper maintenance and safe operation, nail guns may experience malfunctions. Understanding how to identify and troubleshoot common issues is essential for continued safe use.
Identifying and Troubleshooting Battery Issues
If the nail gun fails to start or works intermittently, the battery may be the issue. Check the battery connections and ensure they are secure. If the battery charge is low, fully recharge it before using the nail gun. If the problem persists, consult the manufacturer’s troubleshooting guide or seek professional assistance.
Dealing with Jammed Nails
Nail jams are a common issue with nail guns. If a nail becomes stuck or fails to fire, do not attempt to force it out with additional nails or tools. Disconnect the battery and carefully follow the manufacturer’s instructions for clearing the jammed nail. Avoid using excessive force, as this may cause further damage to the tool.
Addressing Power Loss
If the nail gun experiences a sudden loss of power, check the battery’s charge and connection. Ensure that the battery is securely in place and fully charged. If the problem persists, there may be an issue with the battery or the tool itself. Contact the manufacturer or a qualified technician for assistance.
Training and Certification
Proper training and certification are crucial for safe and effective use of a battery-powered nail gun. It is important to seek training from qualified professionals who can provide hands-on instruction and guidance. Additionally, familiarize yourself with the manufacturer’s instructions and guidelines specific to your nail gun model.
Recognizing Potential Injuries and First Aid
Despite taking all necessary precautions, accidents may still occur. It is crucial to recognize potential nail gun injuries and know how to administer first aid in the event of an accident.
Identifying Nail Gun Injuries
Nail gun injuries can range from minor punctures to more serious wounds. It is important to recognize signs of injury, such as bleeding, pain, or visible nail penetration, and seek medical attention immediately. Even seemingly minor injuries should be assessed by a healthcare professional to ensure proper treatment and prevent potential complications.
Administering First Aid for Nail Gun Accidents
In the event of a nail gun accident, it is important to stay calm and take immediate action. If a nail becomes embedded in the skin, do not remove it yourself. Apply pressure around the wound to control bleeding and seek medical attention as soon as possible. It is essential to follow the advice of healthcare professionals for proper treatment and wound care.
Conclusion
By following these safety tips, users can effectively and safely utilize battery-powered nail guns for various tasks. Remember to always inspect the tool, wear appropriate personal protective equipment, and practice safe operation techniques. Regular maintenance, proper storage, and understanding how to address common malfunctions will ensure the longevity and safe use of the nail gun. Finally, seek proper training and certification and familiarize yourself with the manufacturer’s instructions and guidelines. With these precautions in place, you can confidently and safely use a battery-powered nail gun for your projects.
Safety Precautions When Using A Battery-Powered Sander

Have you ever used a battery-powered sander for your DIY projects? We know how convenient they can be, allowing us to easily tackle sanding tasks without having to worry about cords or finding a power source. But, just like any power tool, it’s important to take certain safety precautions to ensure that we can use the sander without any accidents or injuries. In this article, we will discuss the content safety precautions that we should keep in mind when using a battery-powered sander, so keep reading to learn more!
First and foremost, it is crucial to wear protective gear when using a battery-powered sander. We recommend wearing safety glasses to protect our eyes from any flying debris or dust particles. Additionally, using a dust mask or respirator will help prevent us from inhaling harmful dust or fumes that may be generated during sanding. It’s also a good idea to wear ear protection, such as earmuffs or earplugs, to minimize the noise produced by the sander.
Another important safety precaution is to ensure that the battery in our sander is fully charged before using it. A low battery may result in decreased performance, which can lead to accidents or undesirable outcomes. It’s also important to familiarize ourselves with the sander’s user manual and follow the manufacturer’s instructions for proper handling and usage. This will help us understand the capabilities and limitations of the tool, and prevent any misuse or accidental damage.
Finally, it’s crucial to use the battery-powered sander with caution and mindfulness. Always maintain a firm grip on the tool, and avoid applying excessive pressure or force. Let the sander do the work for us, and avoid any sudden movements that may cause the sander to slip or cause uneven sanding. It’s also important to be aware of our surroundings and keep our fingers, hands, and other body parts a safe distance away from the sanding area.
In conclusion, when using a battery-powered sander, it’s important to prioritize our safety by wearing protective gear, ensuring a fully charged battery, and using the tool with caution. By following these content safety precautions, we can enjoy the convenience and efficiency of a battery-powered sander without compromising our well-being. To learn more about using power tools safely, keep an eye out for our upcoming articles. Happy sanding!

1. Understanding Battery-Powered Sanders
Battery-powered sanders have revolutionized the way we approach sanding projects. These handy tools offer convenience and ease of use, making sanding tasks faster and more efficient. However, it is important to understand the different types of battery-powered sanders and the advantages they offer.
Different Types of Battery-Powered Sanders
There are various types of battery-powered sanders available in the market, each designed for specific applications. The most common types include:
-
Orbital Sanders: These sanders feature a circular sanding pad that moves in an orbital motion. They are great for finish sanding and removing sharp edges.
-
Random Orbital Sanders: These sanders have a round sanding pad that moves in an elliptical motion while simultaneously spinning. They are versatile and can handle both rough and finish sanding tasks.
-
Detail Sanders: These sanders are perfect for getting into tight corners and intricate spaces. They are small and lightweight, making them ideal for small-scale projects.
Advantages of Using a Battery-Powered Sander
Using a battery-powered sander provides several advantages that make sanding tasks easier and more efficient. Some of the key benefits include:
-
Portability: Since battery-powered sanders operate on rechargeable batteries, they can be used anywhere without the need for a power source. This makes them highly portable and convenient for both indoor and outdoor projects.
-
Cordless Operation: The absence of a power cord eliminates the hassle of untangling wires and enables greater freedom of movement. This makes it easier to maneuver the sander around different angles and surfaces.
-
Less Noise and Vibration: Battery-powered sanders tend to produce less noise and vibration compared to their corded counterparts. This not only makes the sanding process more comfortable but also reduces fatigue during extended use.
2. Importance of Safety Precautions
While battery-powered sanders offer many advantages, it is crucial to prioritize safety when using these tools. Failure to follow proper safety precautions can result in accidents and injuries. Understanding the potential hazards and implementing safety measures is essential for a safe sanding experience.
Potential Hazards of Using a Battery-Powered Sander
Using a battery-powered sander without taking proper precautions can expose you to various hazards, including:
-
Hand Injuries: The fast-moving sanding pad can cause injuries if it comes into contact with your hands or fingers.
-
Eye Injuries: Flying debris and particles can cause severe eye injuries if proper eye protection is not worn.
-
Respiratory Issues: Sanding generates fine dust particles that can be harmful if inhaled. Prolonged exposure to dust without proper respiratory protection can lead to respiratory issues.
Why Safety Precautions are Necessary
Implementing safety precautions when operating a battery-powered sander is necessary to minimize the risk of accidents and injuries. Taking the following precautions ensures a safe working environment:
-
Protecting Yourself: Wearing appropriate personal protective equipment (PPE) such as safety goggles, respiratory masks, and gloves helps protect your eyes, respiratory system, and hands from potential hazards.
-
Preventing Accidents: Clearing the work area of clutter and obstructions minimizes the risk of tripping or falling during sanding. Adequate lighting is also necessary to ensure that you can see your work area clearly and avoid accidents.
-
Controlling Dust: Proper dust control measures, including the use of dust extraction systems, help prevent the inhalation of harmful dust particles. Regularly cleaning up after sanding also helps maintain a clean and safe working environment.
3. Personal Protective Equipment (PPE)
When using a battery-powered sander, wearing appropriate personal protective equipment (PPE) is essential to protect yourself from potential hazards. There are specific PPE items that should be used for different parts of the body.
Selecting and Using Eye Protection
Protecting your eyes is of utmost importance when using a battery-powered sander. The high-speed sanding action can produce flying debris and particles that can cause serious eye injuries. Therefore, it is vital to wear safety goggles that provide full eye coverage and have impact-resistant lenses. These goggles should fit snugly and comfortably to ensure maximum protection. Regularly inspect the goggles for any damages or scratches that may impair visibility, and replace them if needed.
Choosing the Right Respiratory Protection
Another crucial aspect of personal safety when using a battery-powered sander is respiratory protection. Sanding generates fine dust particles that, if inhaled, can cause respiratory issues and long-term health problems. Wearing a respiratory mask or respirator with proper filtration capabilities is essential to prevent the inhalation of these particles. Select a mask that is specifically designed for sanding purposes and conforms to the relevant safety standards. Make sure to replace the filter regularly to maintain its effectiveness.
Wearing Protective Gloves and Clothing
Protective gloves and clothing provide an extra layer of protection against potential injuries and hazards. When selecting gloves, choose ones that fit snugly and allow for a firm grip on the sander. Look for gloves that provide excellent dexterity and are made from materials such as leather or synthetic materials that offer good resistance to abrasion. Additionally, wearing long-sleeved shirts and long pants helps protect your arms and legs from dust, debris, and accidental contact with the sanding pad.
4. Work Area Safety
Ensuring a safe work area is crucial when using a battery-powered sander to prevent accidents and injuries. Taking the necessary precautions while setting up the work area can significantly contribute to a safer sanding experience.
Preparing the Work Area
Start by clearing the work area of any unnecessary clutter or obstructions. Remove any items that could get in the way or pose a tripping hazard. Keep the area well-organized, making it easier to move around and operate the sander safely. Additionally, ensure that the work surface is stable and secure to prevent it from shifting or wobbling during sanding.
Ensuring Adequate Lighting
Proper lighting is essential for a safe and accurate sanding experience. Insufficient lighting can make it difficult to see the work area clearly, increasing the risk of accidents. Ensure that the work area is well-lit, either by natural light or artificial lighting sources. Consider using additional spotlights or task lights to illuminate specific areas that require detailed sanding.
Clearing Clutter and Obstructions
Remove any objects, wires, or cords that may obstruct your movement or become entangled with the sander. Keep the power cord or battery pack away from the work area to prevent accidental tripping or interference with sanding operations. Taking the time to clear the work area of clutter and obstructions reduces the risk of accidents and creates a safe environment for sanding.

5. Battery Handling and Charging
Proper handling and charging of the battery for your battery-powered sander is essential for both safety and performance. Battery mishandling or faulty charging practices can lead to accidents, reduced battery life, or even damage to the sander.
Proper Battery Handling
Always handle the battery and battery pack with clean, dry hands. Avoid exposing the battery to extreme temperatures or moisture, as this can cause damage or reduce its performance. When removing or inserting the battery, ensure that the power switch is turned off to prevent accidental start-up. Additionally, store the battery in a cool, dry place away from direct sunlight to maintain its longevity.
Charging Safety Tips
Follow the manufacturer’s guidelines for charging the battery. Use only the provided charger or a charger specifically designed for your battery model. Never attempt to modify or repair the charger yourself. Before charging, inspect the battery for any visible damage, leaks, or signs of overheating. If you notice any abnormalities, do not charge the battery and contact the manufacturer for further instructions. It is also important to keep the charging area well-ventilated and avoid charging the battery near flammable materials.
Storage and Transportation Precautions
When storing or transporting the battery-powered sander, remove the battery from the tool for safety reasons. This reduces the risk of accidental activation or damage during transit. Store the battery in a secure, well-ventilated location away from children and pets. Use the original packaging or a dedicated battery case to protect the battery from impact and exposure to extreme temperatures.
6. Sander Operation Safety
Operating a battery-powered sander safely involves understanding the tool’s features, inspecting it before use, and using the sander correctly.
Reading and Understanding the User Manual
Before using a battery-powered sander, it is essential to read and understand the manufacturer’s user manual. The user manual provides critical information on the tool’s operation, safety guidelines, and maintenance procedures. Familiarize yourself with the specific features, controls, and safety precautions described in the manual to ensure proper and safe use of the sander.
Inspecting the Sander before Use
Before starting any sanding task, inspect the sander for any visible damage or defects. Check the power cord, battery pack, sanding pad, and any other components for signs of wear or malfunction. If you notice any issues, refrain from using the sander and have it inspected or repaired by a qualified technician. Regularly clean the sanding pad and remove any debris that may hinder its performance.
Using the Sander Correctly
When operating the battery-powered sander, firmly grip the handle to maintain control and stability. Apply even pressure and let the sander do the work; avoid excessive force or pushing down too hard, as this can affect the sanding quality and increase the risk of accidents. Move the sander in a smooth and consistent motion, following the grain of the material being sanded. Avoid abrupt stops or changes in direction that may cause the sander to kickback.
7. Dust Control Measures
Dust control is crucial when using a battery-powered sander to protect your health and maintain a clean working environment. Implementing effective dust control measures helps prevent the inhalation of harmful dust particles and minimizes the risk of dust-related health issues.
Importance of Dust Control
Sanding generates a significant amount of fine dust particles that can pose serious health risks if inhaled. Prolonged exposure to dust particles can lead to respiratory issues, allergies, and even lung diseases. Additionally, excessive dust can accumulate on the work surface, reducing visibility and affecting the sanding quality. Therefore, implementing dust control measures is essential for both personal safety and achieving optimal sanding results.
Using Dust Extraction Systems
Dust extraction systems or vacuum attachments are effective tools for capturing and containing dust generated during sanding. These systems are designed to connect to the sander and suck in the dust as it is produced. They typically employ filters and dust collection bags to trap the dust particles, preventing them from being released into the air. Regularly clean or replace the filters and empty the dust collection bags to maintain their efficiency.
Cleaning Up After Sanding
After completing a sanding task, it is crucial to thoroughly clean up the work area. Use a vacuum cleaner or a broom with a dustpan to remove any residual dust and debris. Wipe down surfaces with a damp cloth to remove any fine dust particles that may have settled. Properly dispose of the collected dust and debris according to local regulations. Regularly cleaning the work area not only ensures a safe working environment but also helps prolong the lifespan of your battery-powered sander.
8. Emergency Preparedness
Being prepared for emergencies while using a battery-powered sander is an essential aspect of ensuring personal safety. Familiarize yourself with emergency stops, have access to first aid and fire extinguishers, and know how to handle accidents and injuries.
Knowing the Location of Emergency Stops
Before starting any sanding task, locate and familiarize yourself with the emergency stops or shut-off buttons on the sander. In the event of an emergency or if the sander malfunctions, knowing how to immediately stop the tool can prevent further accidents or injuries.
First Aid and Fire Extinguishers
Have a well-stocked first aid kit easily accessible in your work area. The kit should contain items such as bandages, antiseptic solution, and adhesive tape for treating minor injuries. Additionally, ensure that a fire extinguisher suitable for extinguishing electrical fires is within reach. Familiarize yourself with the proper use of the fire extinguisher and regularly inspect it to ensure it is in good working condition.
Handling Accidents and Injuries
In the event of an accident or injury, it is important to respond quickly and appropriately. If the injury is severe or life-threatening, seek medical attention immediately. For minor injuries, administer basic first aid treatment according to the instructions in your first aid kit. Document any accidents or injuries that occur and report them to the necessary authorities or your supervisor. Learning basic first aid procedures can make a significant difference in the outcome of an emergency situation.
9. Maintenance and Inspection
Regular cleaning, maintenance, and inspection of your battery-powered sander are necessary to ensure its optimum performance and safety. By implementing proper maintenance routines, you can identify and address any issues before they escalate.
Regular Cleaning and Maintenance
After each use, clean the sander to remove dust and debris that may have accumulated. Use a soft brush or compressed air to clean hard-to-reach areas. Regularly inspect and clean the sanding pad, ensuring it is free from any residual material that may affect its performance. Lubricate any moving parts according to the manufacturer’s recommendations to maintain smooth operation.
Inspecting for Damage and Malfunction
Regularly inspect the sander for any signs of damage, wear, or malfunction. Check the power cord, battery pack, and other components for fraying, cracks, or loose connections. Examine the sanding pad for any signs of deterioration or uneven wear. If you notice any abnormalities, immediately stop using the sander and have it inspected or repaired by a qualified technician.
Replacing Parts and Batteries
Over time, certain parts of the sander may wear out or require replacement. Follow the manufacturer’s recommendations for replacing worn-out parts, such as sanding pads or brushes. When replacing the battery, ensure that you use a compatible battery pack that meets the manufacturer’s specifications. Dispose of old or damaged batteries according to local regulations and avoid throwing them in regular trash bins.
10. Conclusion
Sanding projects can be completed quickly and efficiently with the help of battery-powered sanders. However, it is crucial to prioritize safety by implementing the necessary precautions. By understanding the potential hazards, wearing the appropriate personal protective equipment (PPE), preparing the work area, handling and charging batteries correctly, operating the sander safely, controlling dust, being prepared for emergencies, and practicing regular maintenance and inspection, we can ensure a safe sanding experience.
Remember, safety should always be our top priority when using a battery-powered sander. By following the outlined safety precautions, we can enjoy the convenience and efficiency of these tools while minimizing the risk of accidents and injuries. It is our responsibility to use battery-powered sanders responsibly and encourage others to do the same, ensuring a safe and productive work environment for everyone involved.